How to Bridge XCN from Ethereum to Onyx Layer 1 – Step by Step Guide
If you hold XCN on Ethereum and want to access the 30% APR staking available on Onyx Layer 1, this guide walks you through the exact process – from unstaking on Ethereum all the way to staking on Layer 1. Every step is documented from a real migration done in July 2026.
Before you start, read Why Onyx Is Moving to Layer 1 – What XCN Holders Need to Know for the full context on why this migration matters and the December 31, 2026 deadline for the Layer 3 deprecation.
What You Need Before You Start
- XCN on Ethereum – either staked (you’ll unstake first) or liquid in a wallet
- Onyx Wallet – the official wallet for the Onyx ecosystem, download at onyx.org. Available on iOS and Android
- A small amount of ETH – you need ETH in your Ethereum wallet for gas fees. The good news: fees for this entire process are minimal. Our full migration cost under $0.20 in total gas fees
- MetaMask or another Ethereum wallet – if your XCN is currently in MetaMask or a similar wallet
Part 1 – Unstake Your XCN From Ethereum (if currently staked)
If your XCN is already liquid in a wallet, skip to Part 2.
If you’re staking on Ethereum through app.onyx.org, you’ll need to unstake first.
Step 1: Open app.onyx.org in your browser and connect your Ethereum wallet.
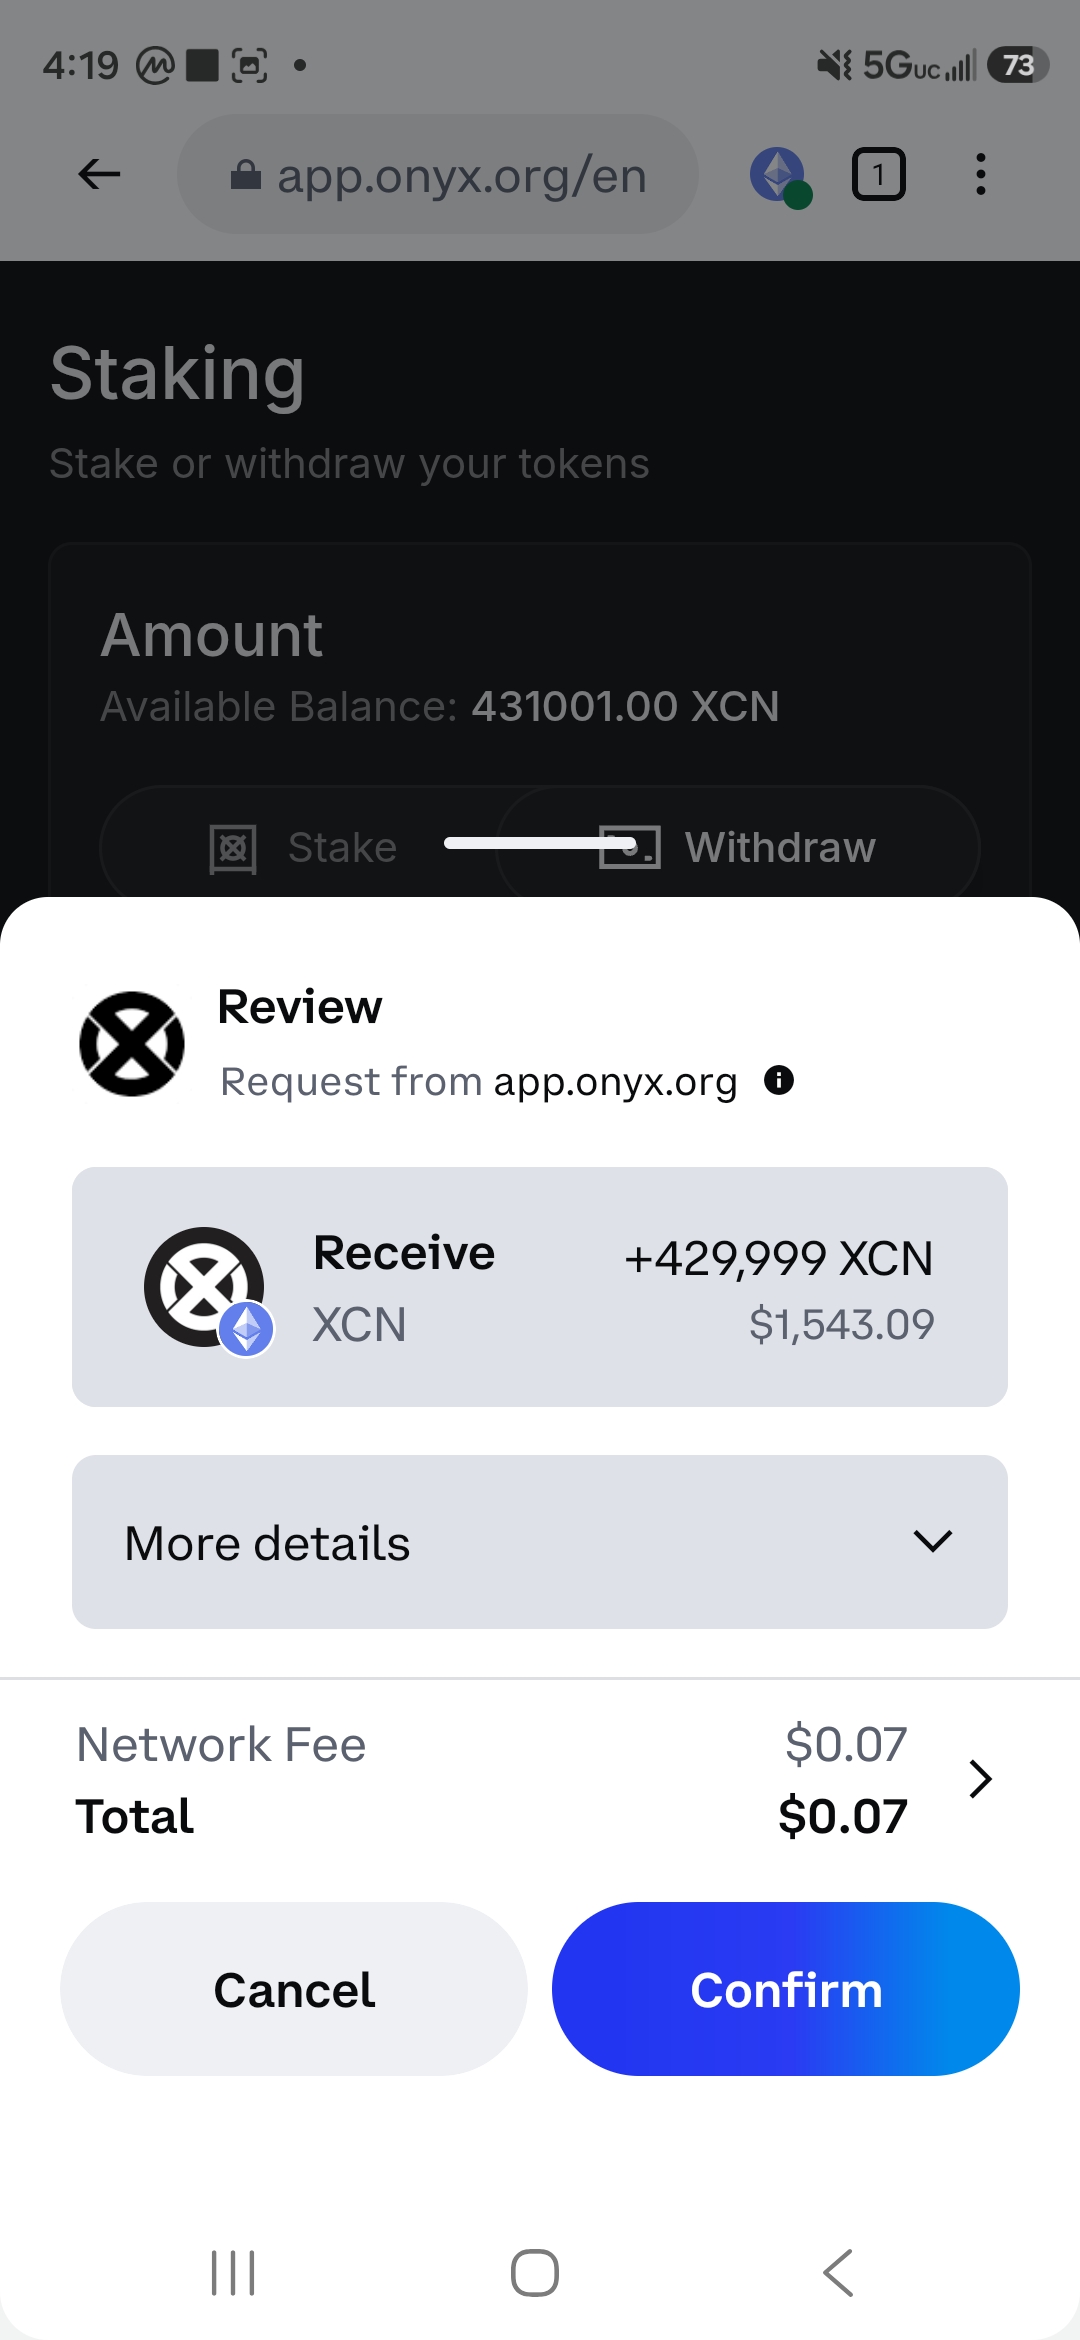
Step 2: Navigate to the Staking section. You’ll see your current staked balance and the current Ethereum staking APR – which as of July 2026 sits around 6.32%, significantly lower than the 30% available on Layer 1.
Step 3: Switch to the Withdraw tab and enter the amount you want to unstake, or use the Max button for everything.
Step 4: Your wallet will prompt you to confirm the transaction. Review the details – you’ll see the amount of XCN you’re receiving back and the network fee (ours was $0.04 to $0.07 per transaction).
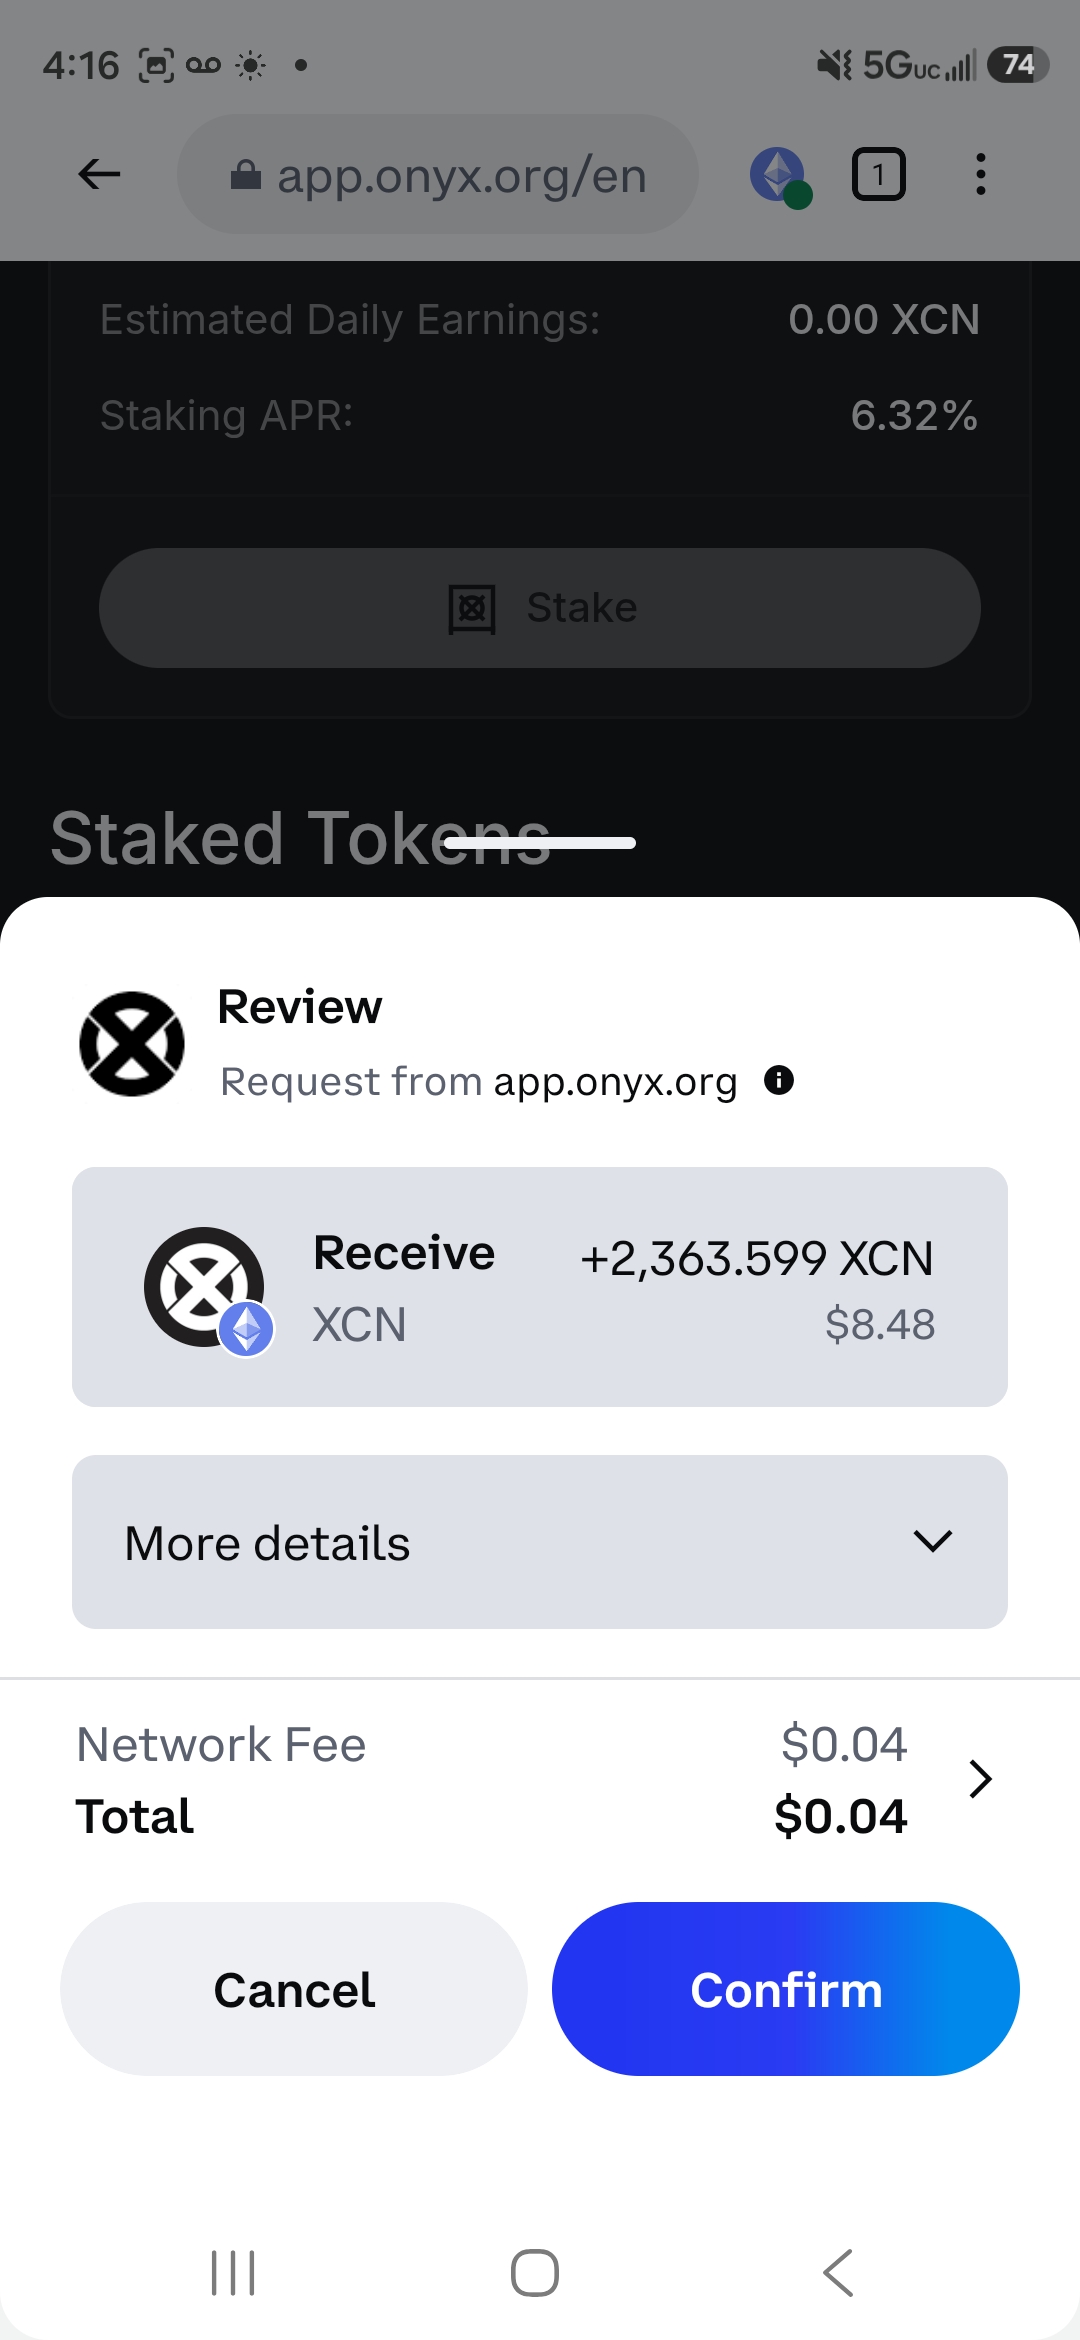
Step 5: Confirm and send. Your XCN returns to your Ethereum wallet almost immediately.
Pro tip: If you have a large staked position, you may want to unstake in batches rather than all at once – this gives you more control and lets you verify each step before committing everything.
Part 2 – Set Up Onyx Wallet
The Onyx Wallet is the recommended wallet for the Onyx ecosystem. It supports both Ethereum and Onyx Layer 1 natively, has a built-in dApp browser for accessing app.onyx.org directly, and handles the bridge process cleanly.
Step 1: Download Onyx Wallet from onyx.org. Available on iOS and Android.
Step 2: Create a new wallet or import an existing one. Write your seed phrase on paper and store it safely – standard crypto security rules apply.
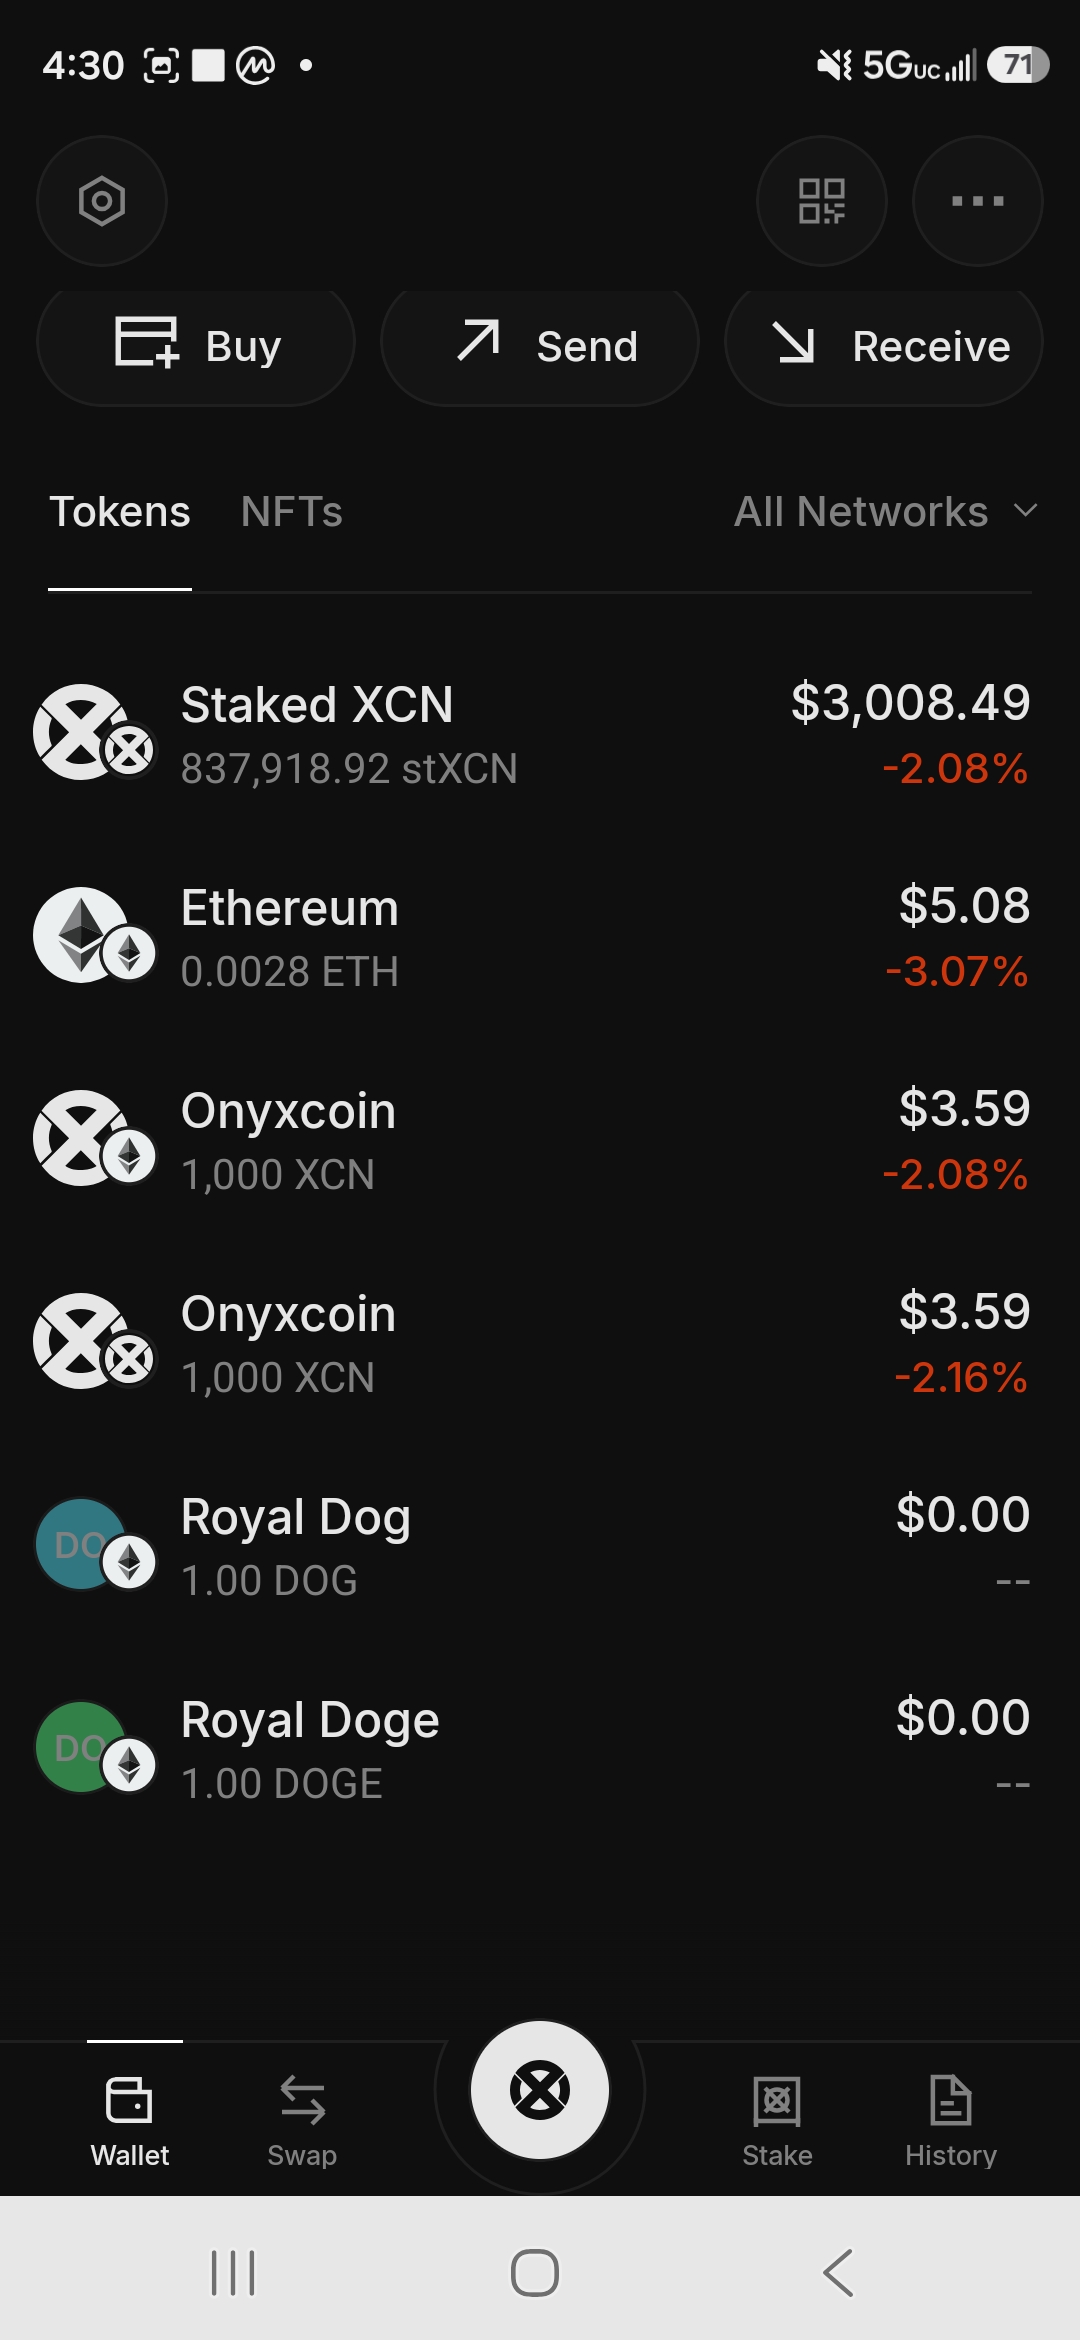
Step 3: Once set up, you’ll see the main wallet interface with five bottom tabs: Wallet, Swap, the Onyx logo (main menu), Stake, and History.
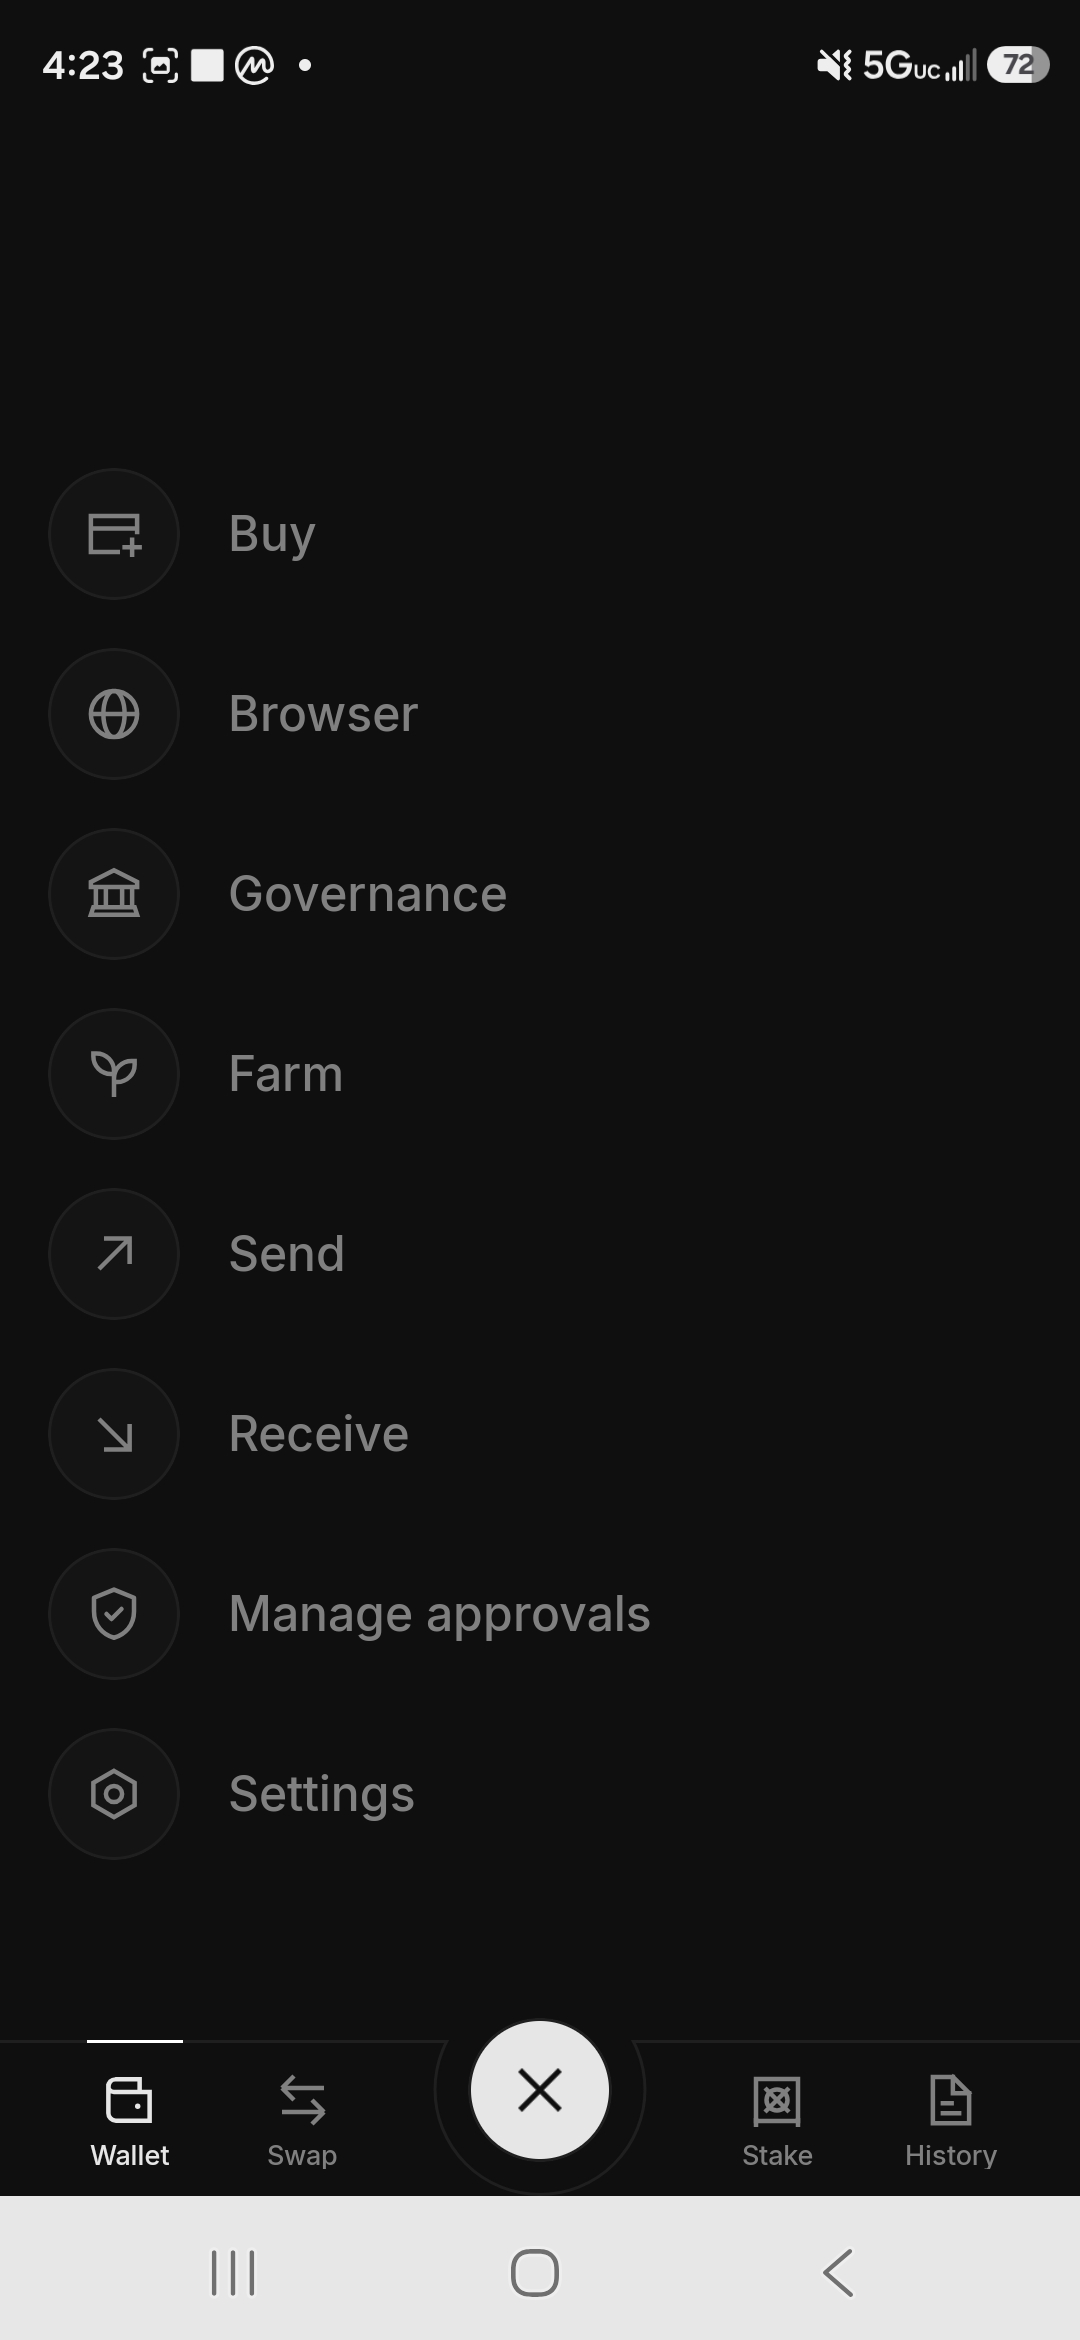
Step 4: Tap the Onyx logo in the center to access the full menu – you’ll see options for Buy, Browser, Governance, Farm, Send, Receive, Manage Approvals, and Settings.
Step 5: Go to Receive and copy your Onyx Wallet address. This is the address you’ll send your XCN to from MetaMask in the next step.
Part 3 – Send XCN to Your Onyx Wallet
Before bridging to Layer 1, you need your XCN in your Onyx Wallet on the Ethereum network.
Step 1: In MetaMask (or whichever wallet holds your XCN), initiate a Send transaction.
Step 2: Paste your Onyx Wallet address as the destination. Make sure you’re sending on the Ethereum network – not Base, not BNB Chain.
Step 3: Enter the amount. You’ll see a summary showing the XCN amount, dollar value, network fee ($0.01-$0.02), and total cost.
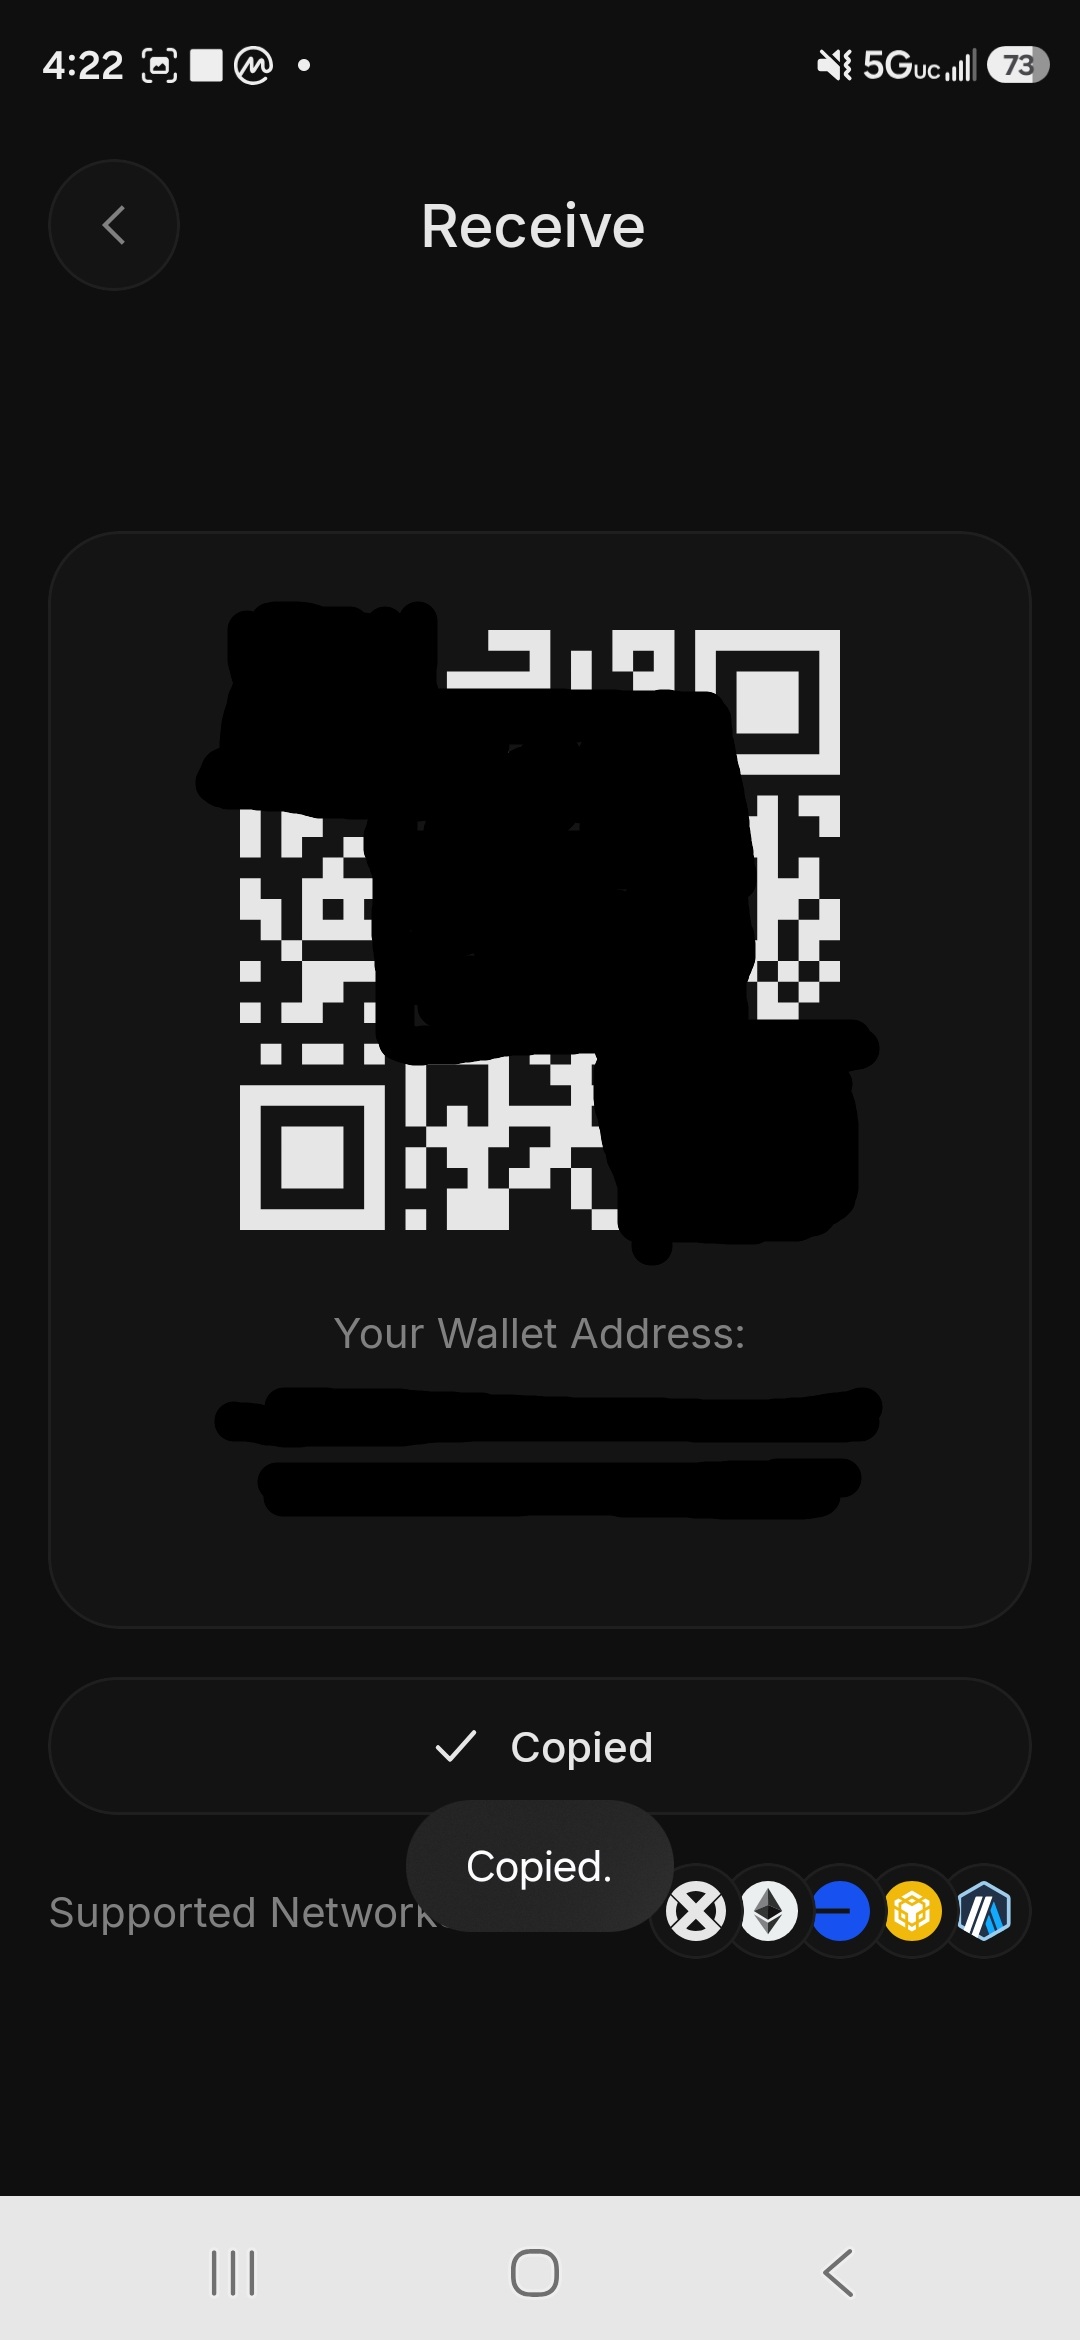
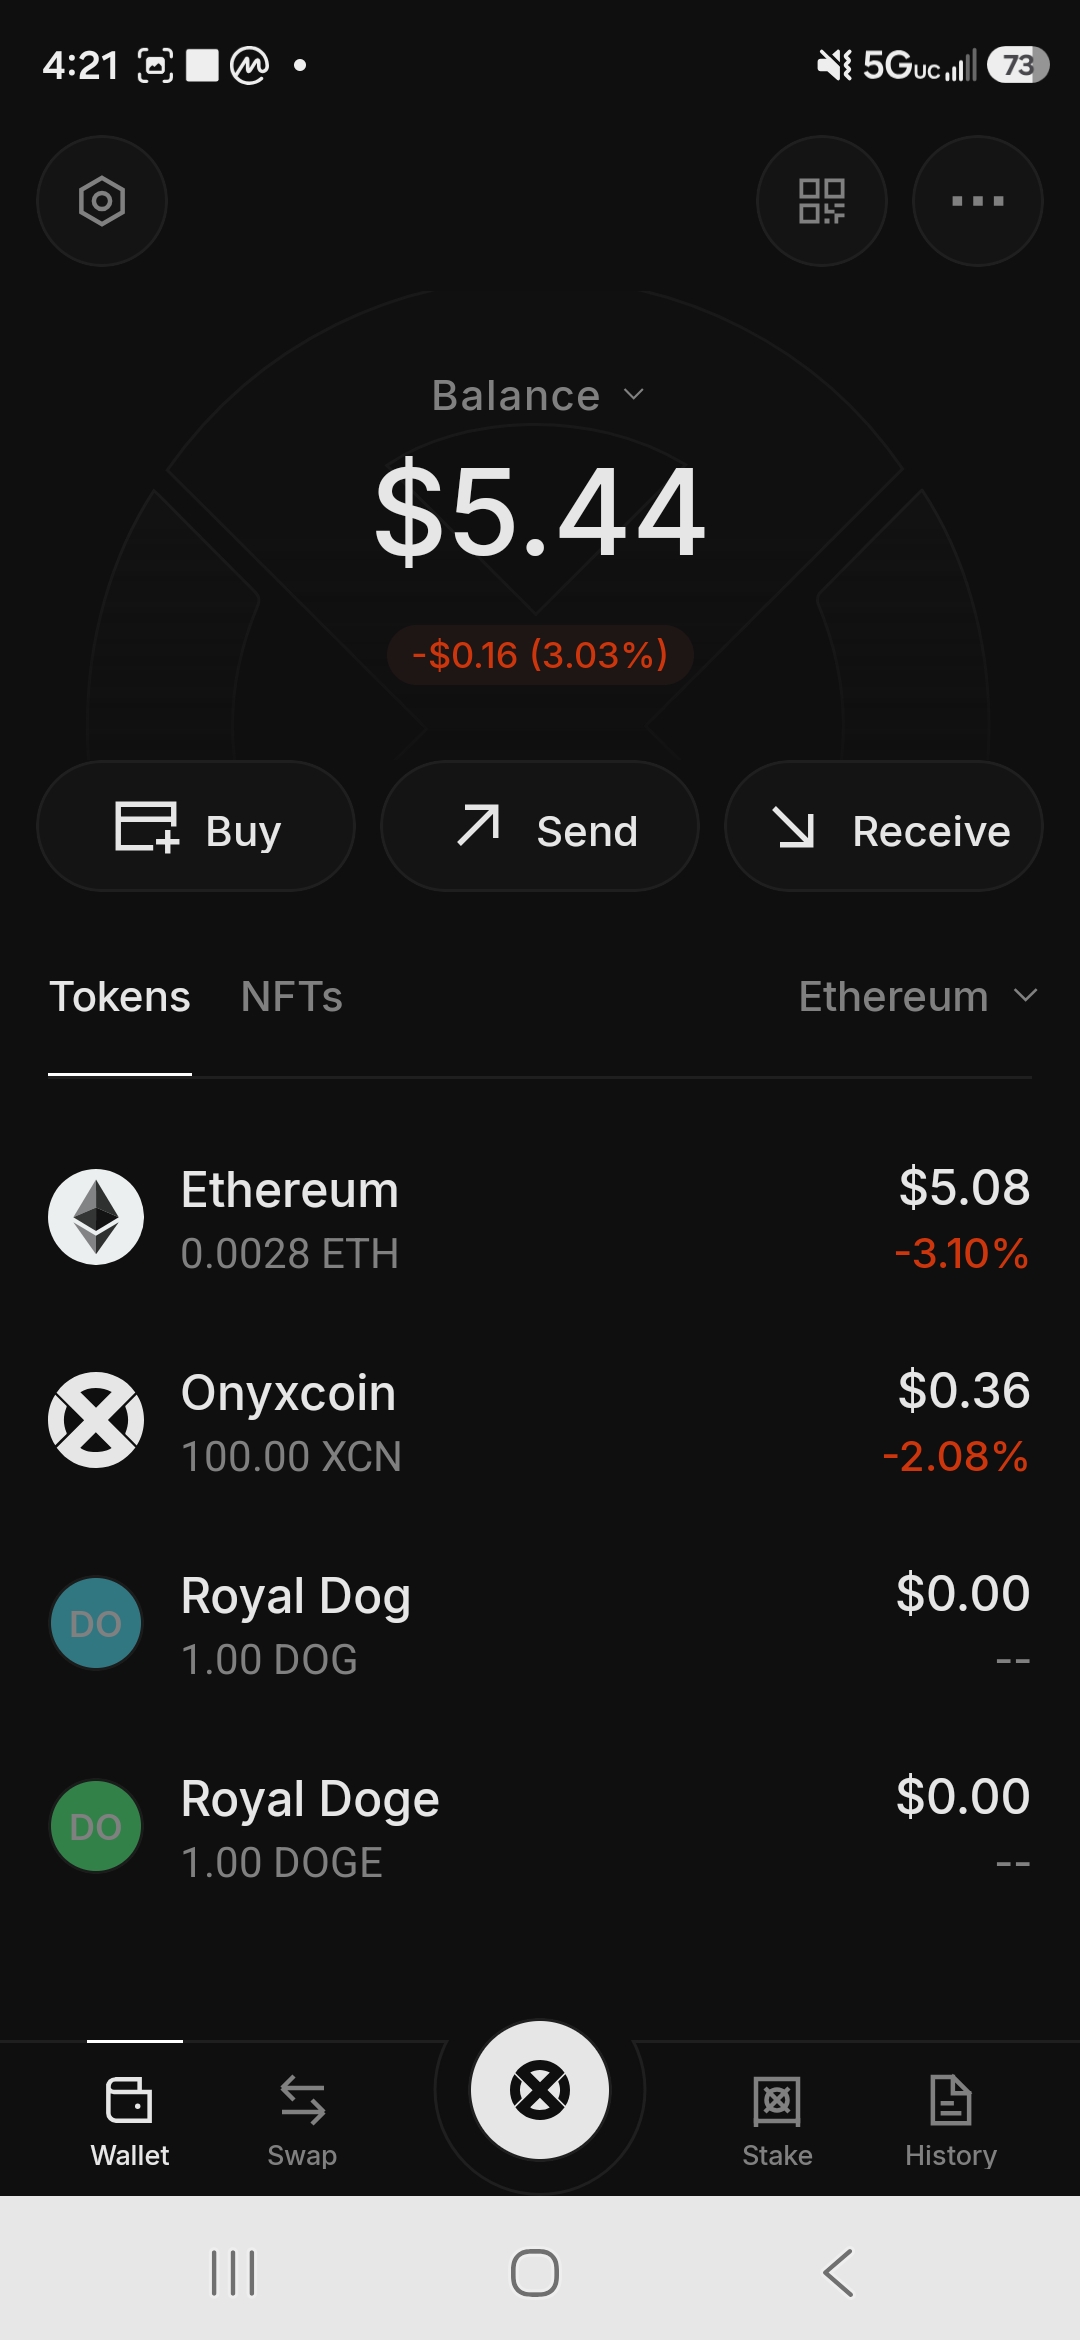
Step 4: Confirm the transaction. XCN arrives in your Onyx Wallet within a minute or two.
Important decision point: Before sending everything, decide how much XCN to keep on Ethereum. We recommend keeping a small reserve on your Ethereum address for two reasons. First, if you’ve been earning Onyx Points on Ethereum staking, keeping that address active preserves your points history in case there’s a future snapshot or distribution tied to Ethereum activity. Second, it gives you flexibility – a small ETH-side position means you can still access Ethereum DeFi without bridging back. We kept 1,000-2,000 XCN on Ethereum for this reason.
Part 4 – Bridge XCN From Ethereum to Onyx Layer 1
This is the core step. The bridge moves your XCN from the Ethereum network onto the Onyx Layer 1, where you can stake at 30% APR.
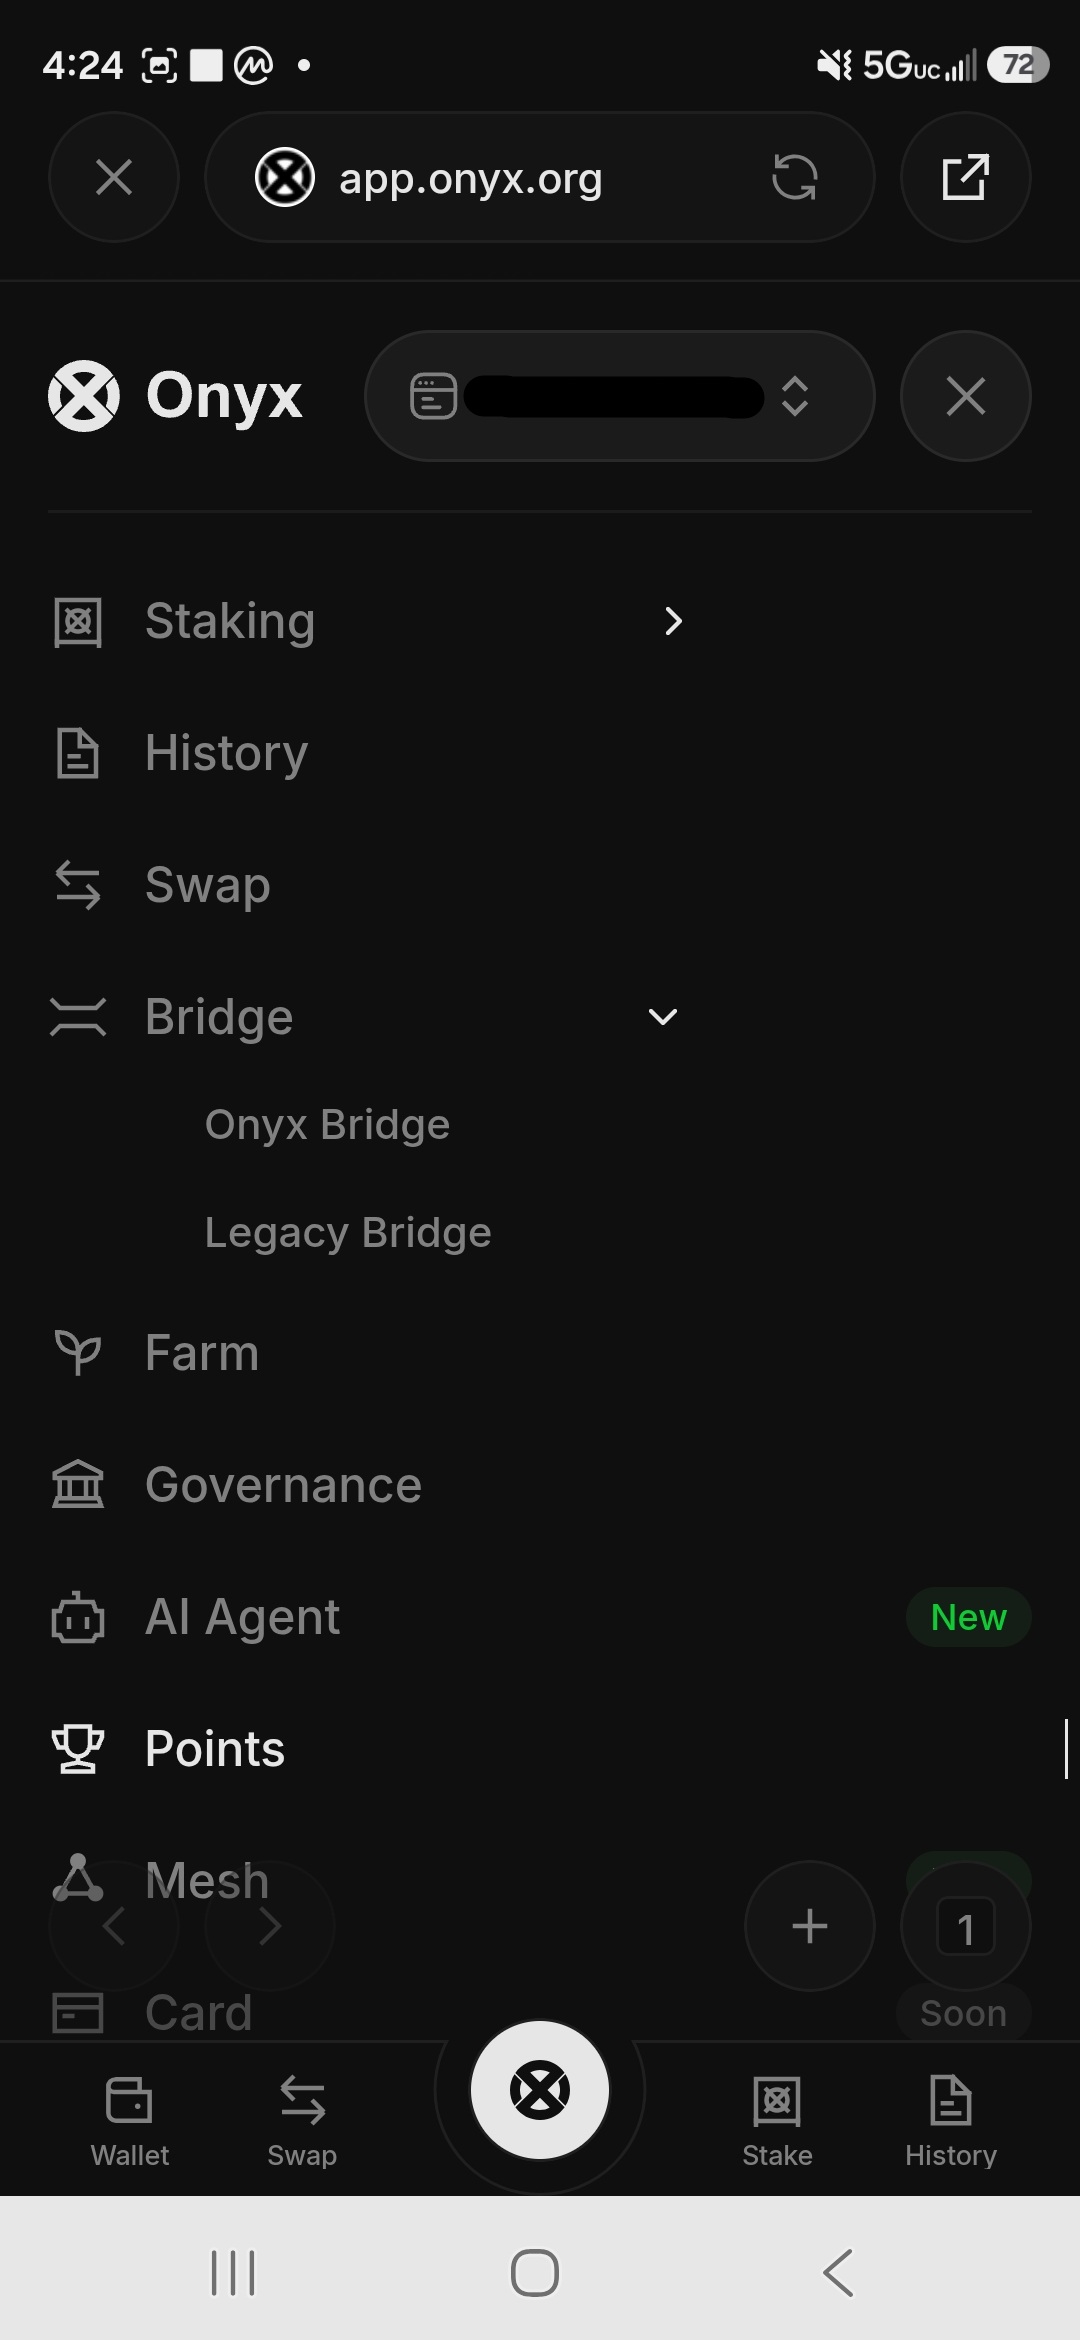
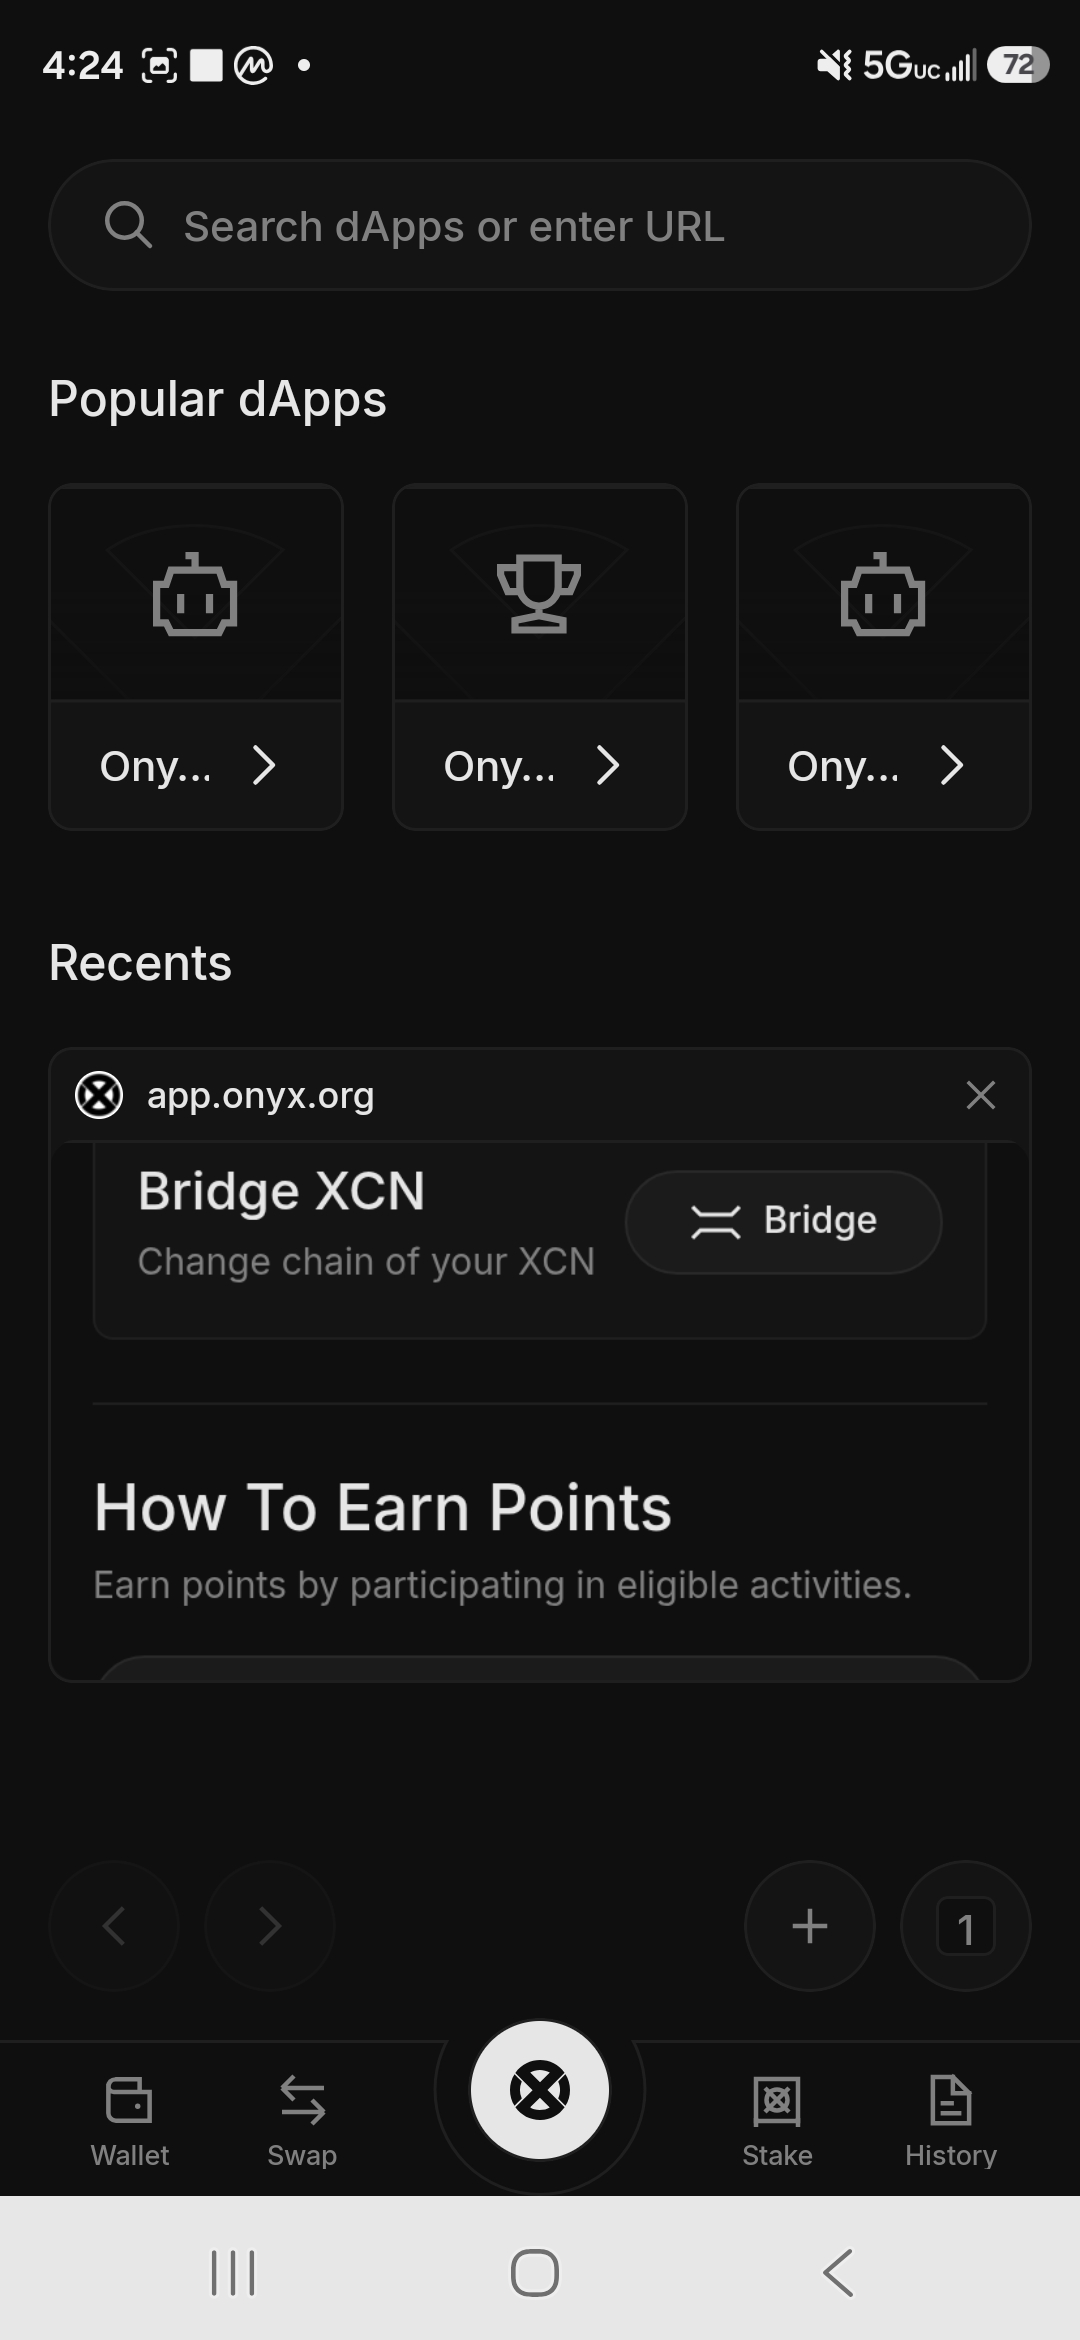
Step 1: In Onyx Wallet, tap the center Onyx logo, then tap Browser. You’ll see Popular dApps and Recents – tap the Bridge XCN shortcut or navigate to app.onyx.org.
Step 2: In the app, go to Bridge from the navigation menu. You’ll see two bridge options – Onyx Bridge and Legacy Bridge. Always use Onyx Bridge. The Legacy Bridge is for the old Layer 3 which is being deprecated on December 31, 2026 – do not use it for new transfers.
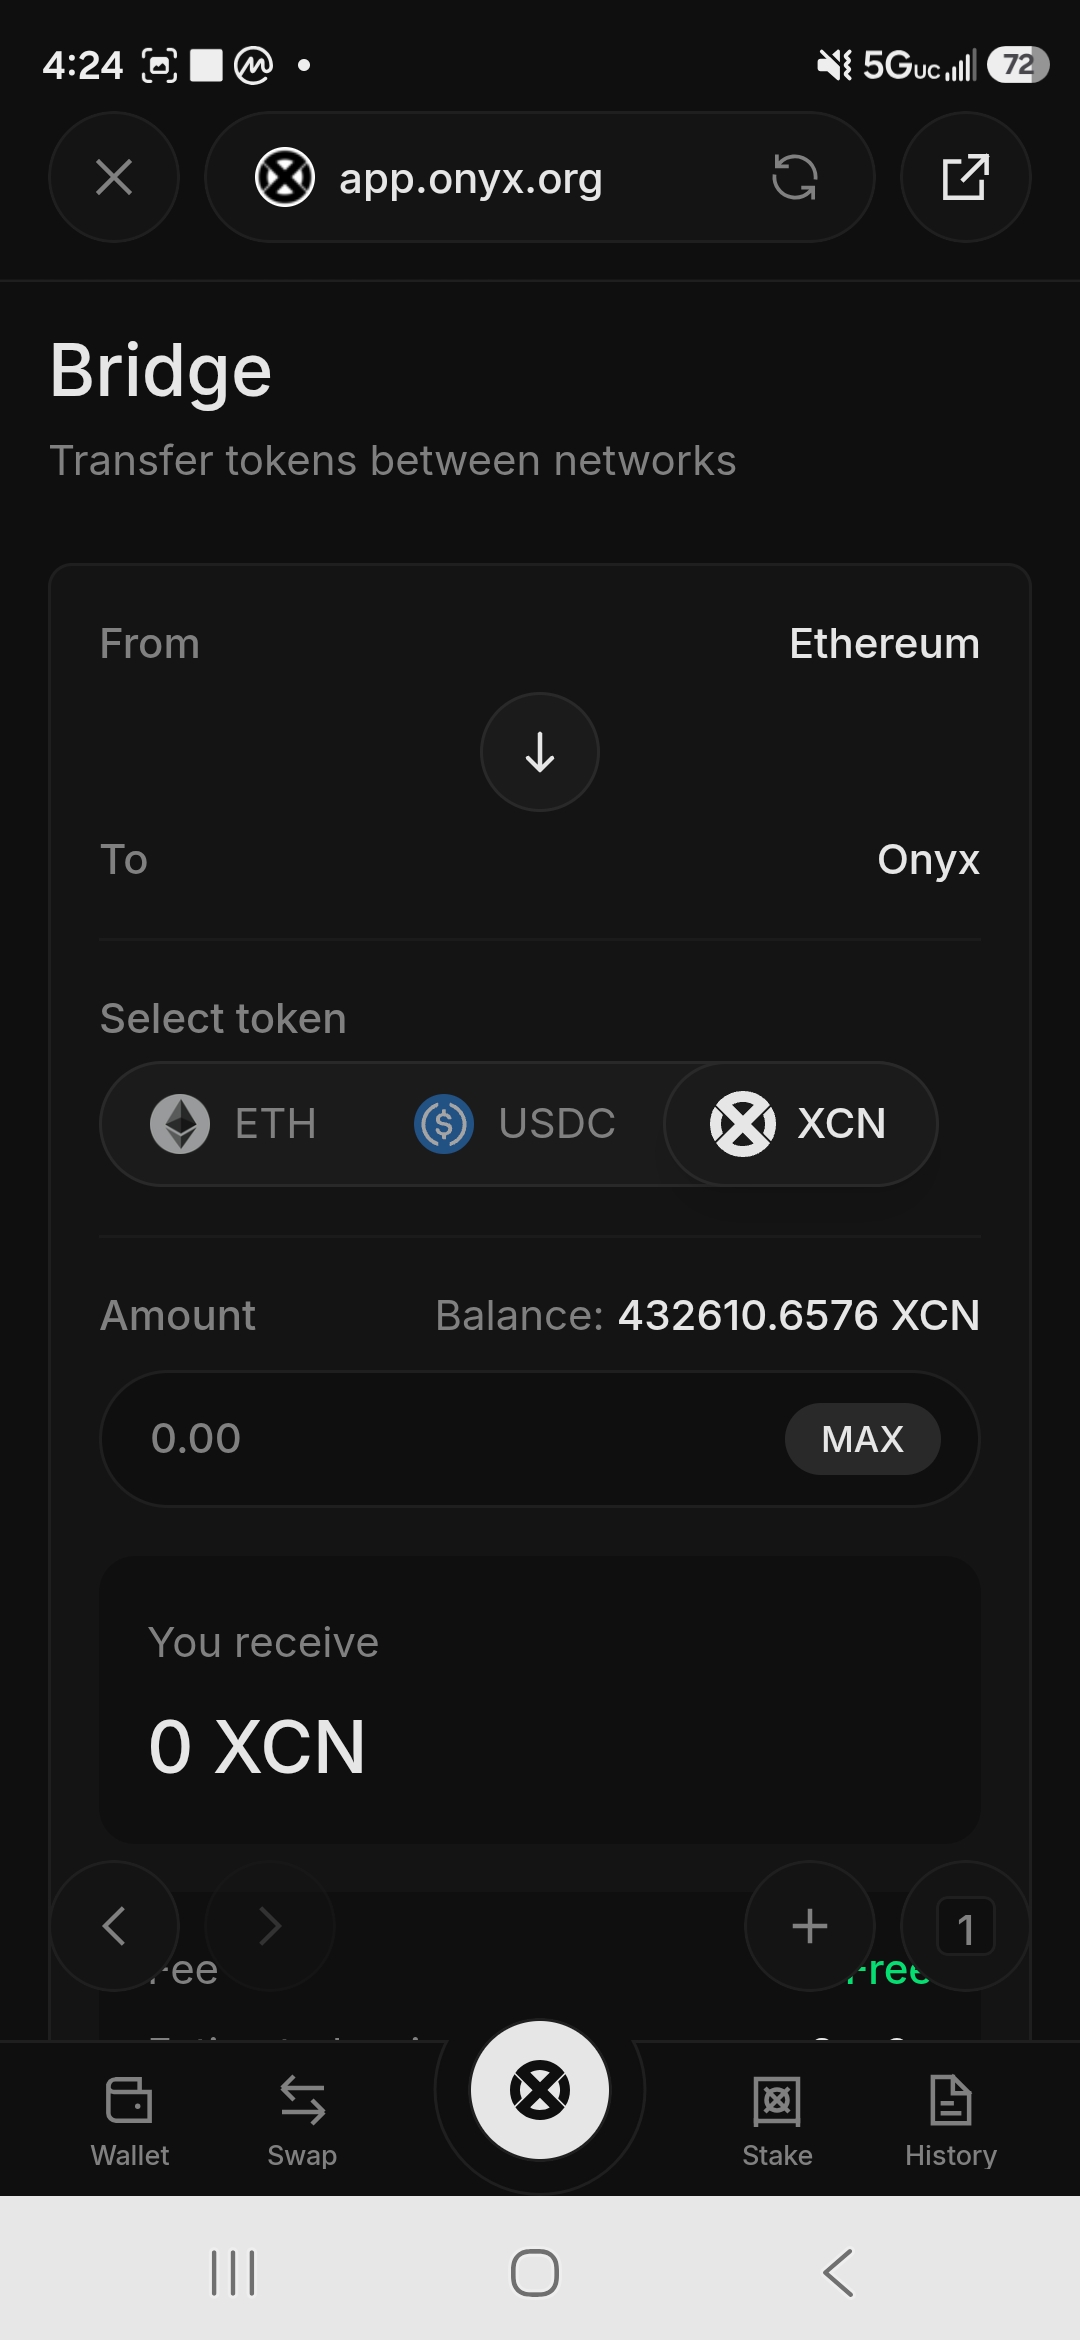
Step 3: The Bridge screen shows:
- From: Ethereum
- To: Onyx
- Token: select XCN
- Your balance will display automatically
Step 4: Enter the amount you want to bridge, or tap MAX to bridge everything. You’ll see “You receive: [same amount] XCN” and two key details – Fee: Free and Estimated arrival: ~2 minutes.
The bridge is completely free. No bridging fee on top of the gas costs.
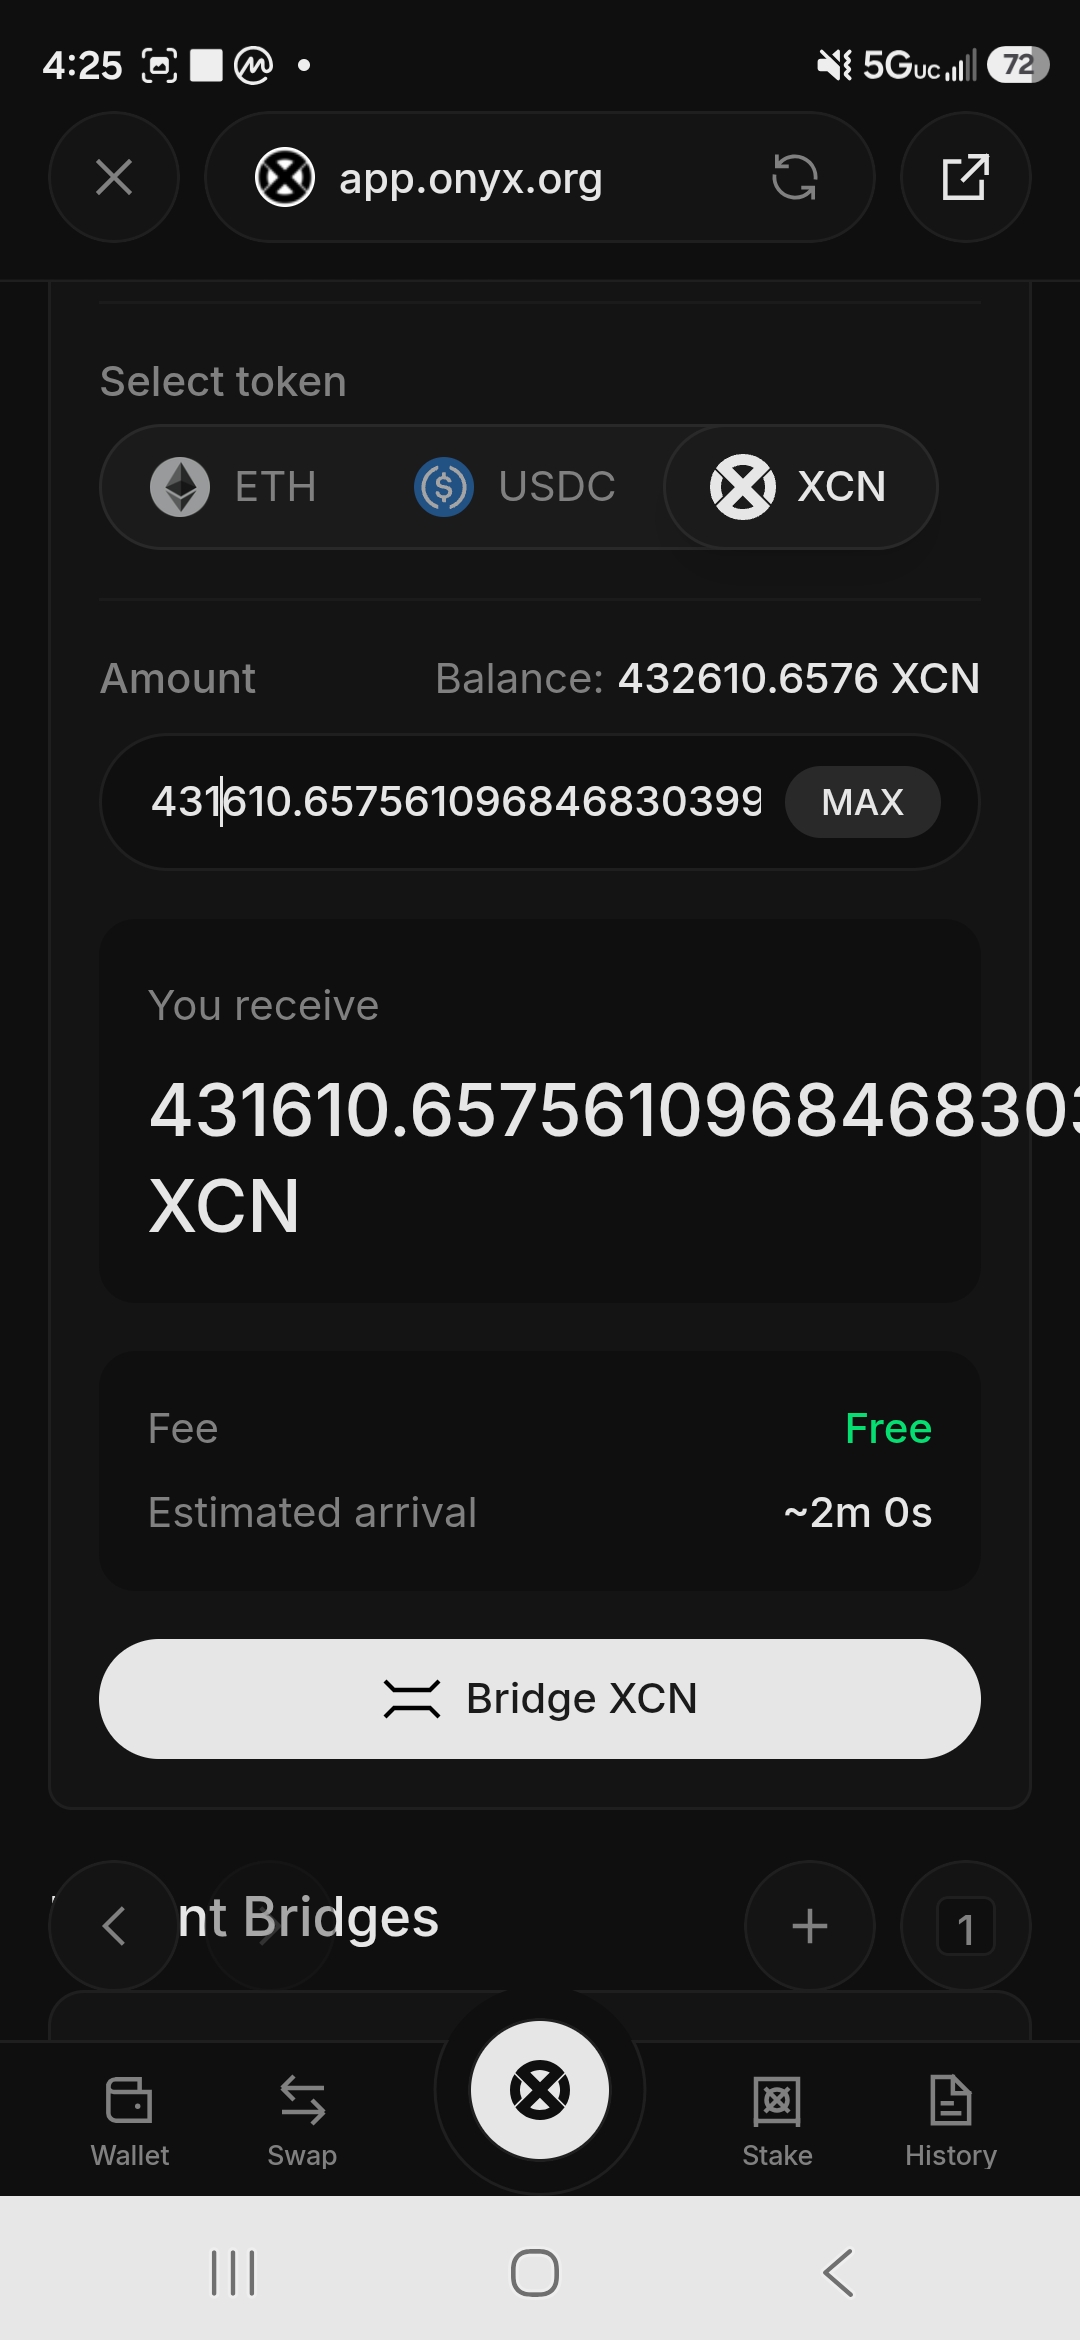
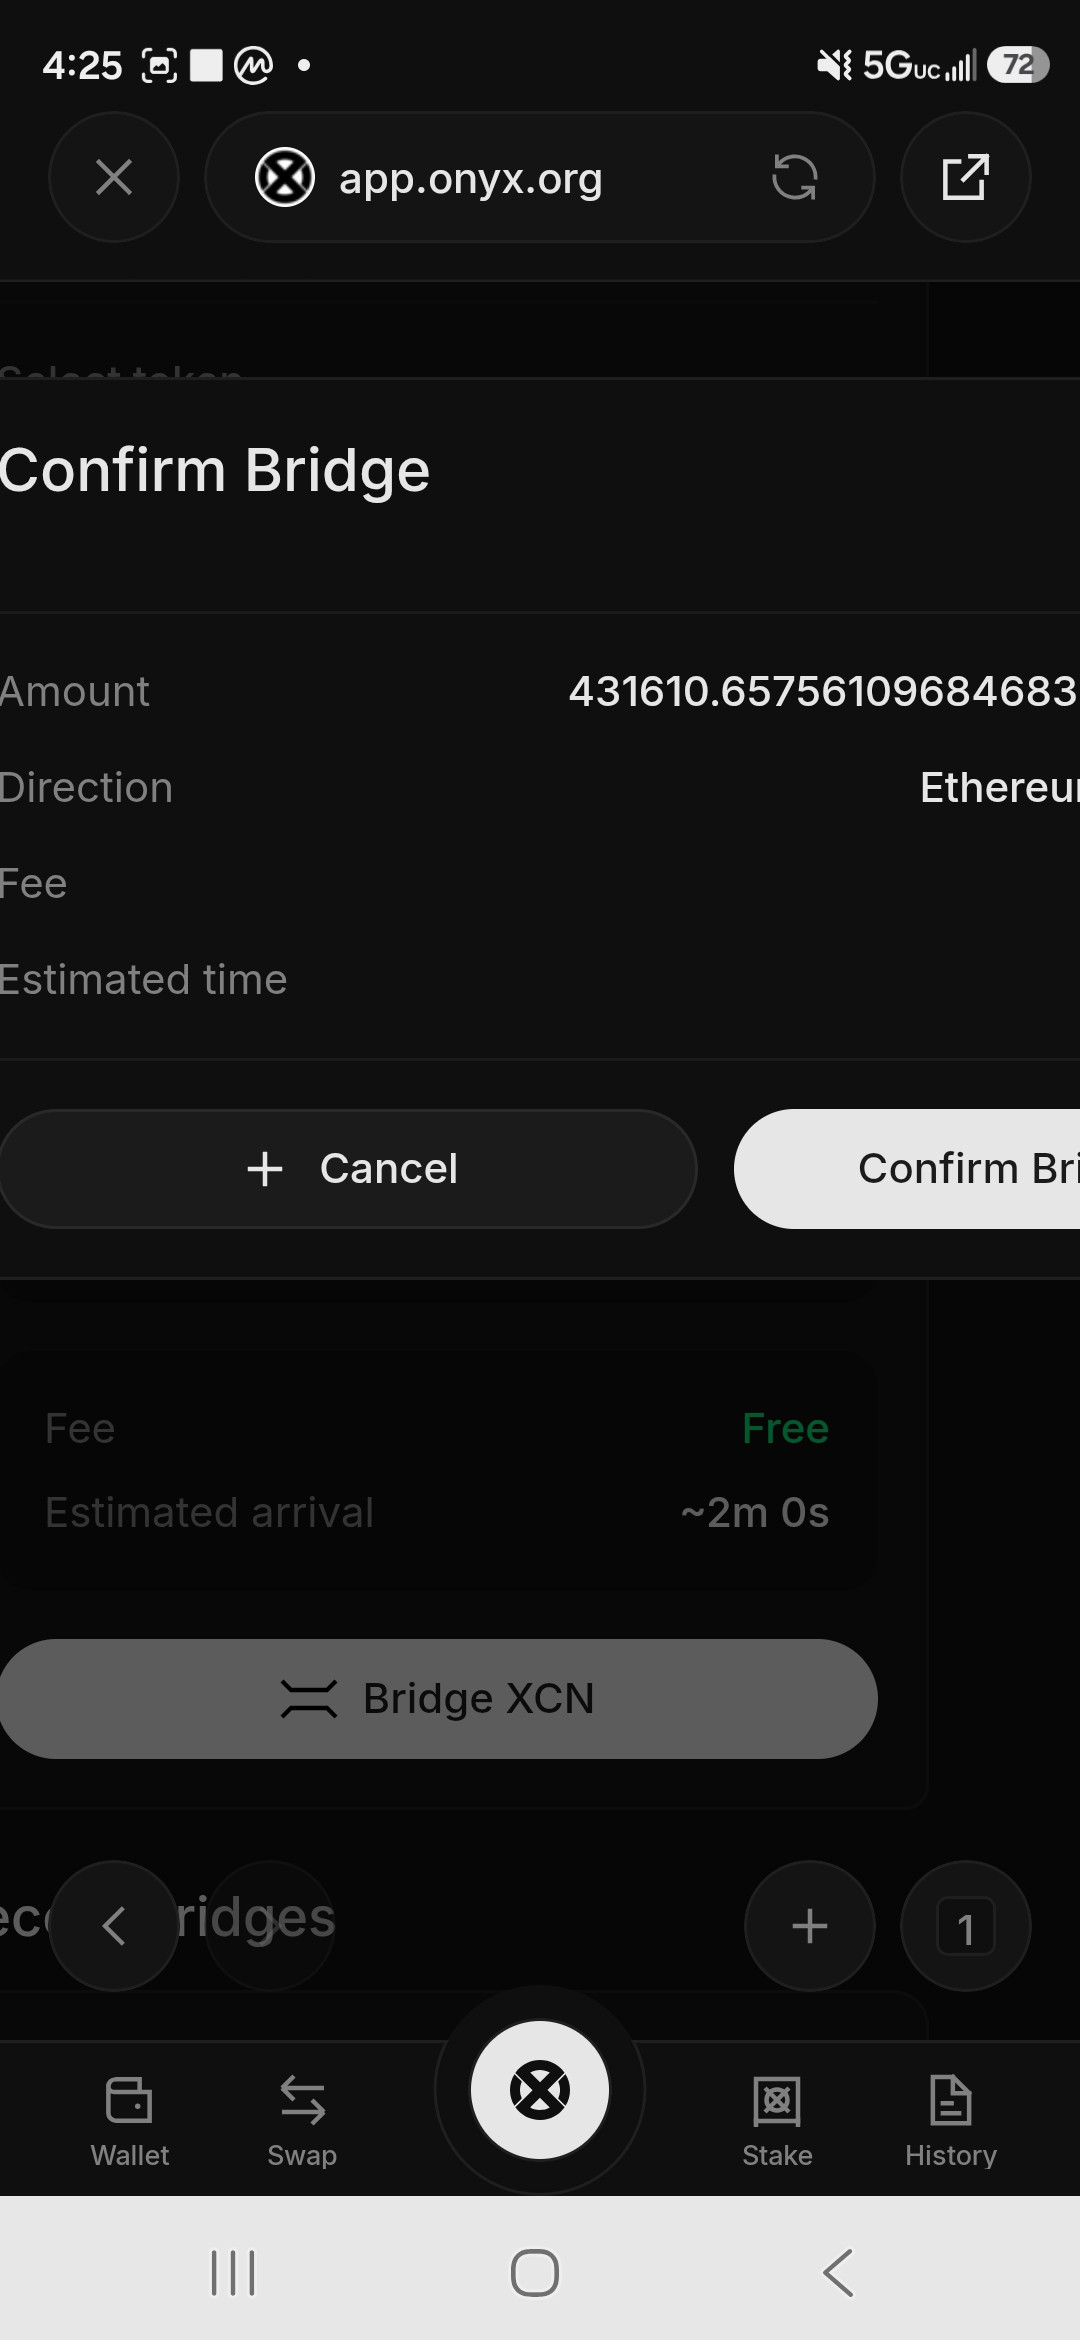
Step 5: Tap Bridge XCN. A Confirm Bridge screen appears showing the amount, direction (Ethereum), and confirming the fee is free.
Step 6: Your wallet will prompt you with a Confirm Transaction popup showing:
- The destination contract address
- Value: 0x0 (no ETH being sent, just XCN)
- Function: deposit(address, uint256, address)
- Network: Ethereum (1)
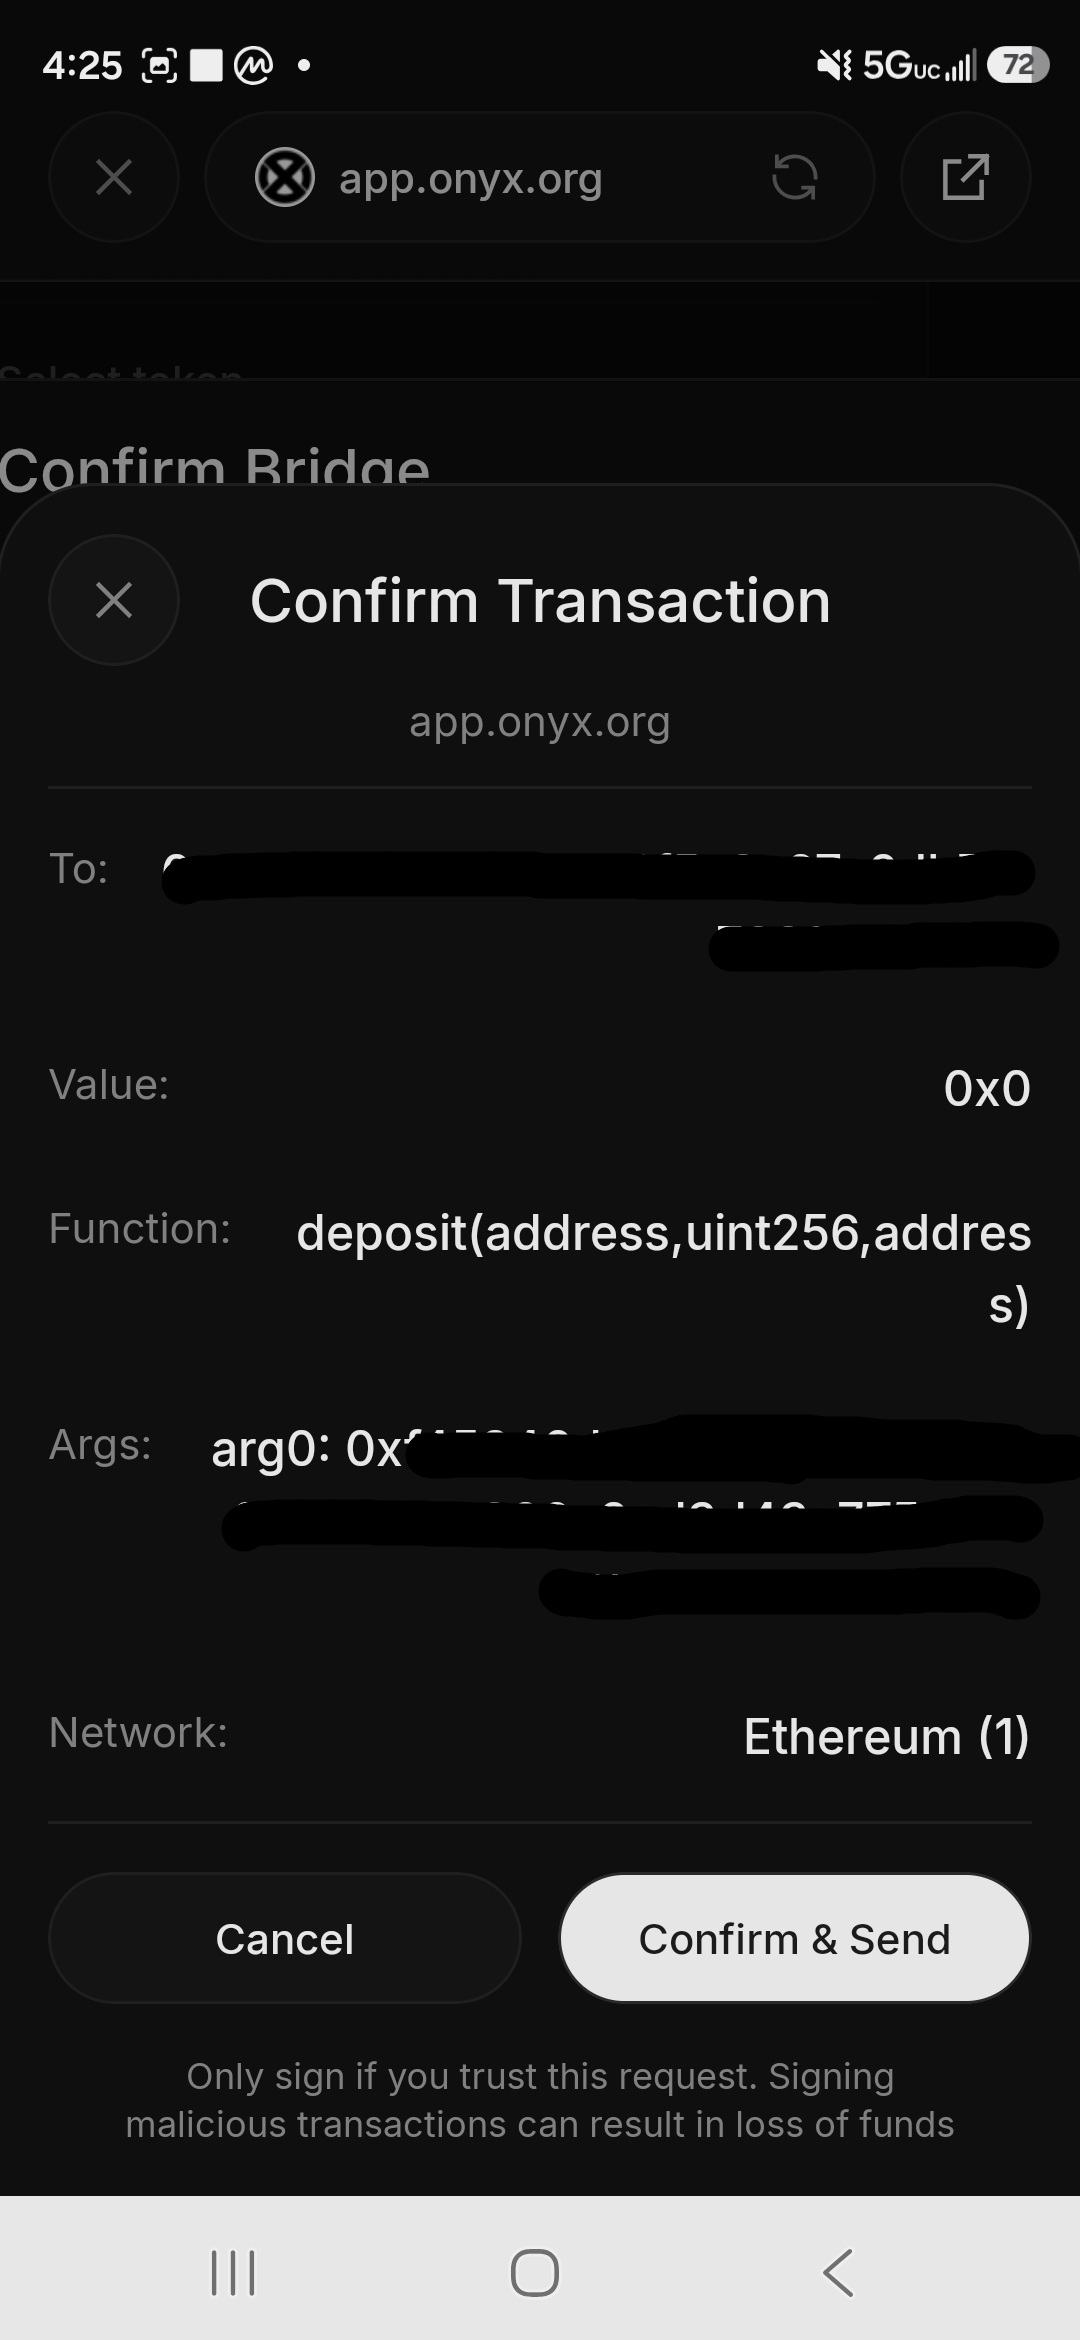
This is normal and expected. The “deposit” function is how the bridge contract locks your Ethereum-side XCN before minting the equivalent on Onyx Layer 1. Tap Confirm & Send.
Step 7: The bridge progress screen shows five steps in real time:
- ✅ Deposit sent on Ethereum
- ✅ Waiting for confirmations (needs 6 confirmations – takes about 1-2 minutes)
- ✅ Bridge relayer processing
- ✅ Minting on Onyx
- ✅ Bridge complete
The whole process took approximately 2-3 minutes from confirmation to completion in our test.
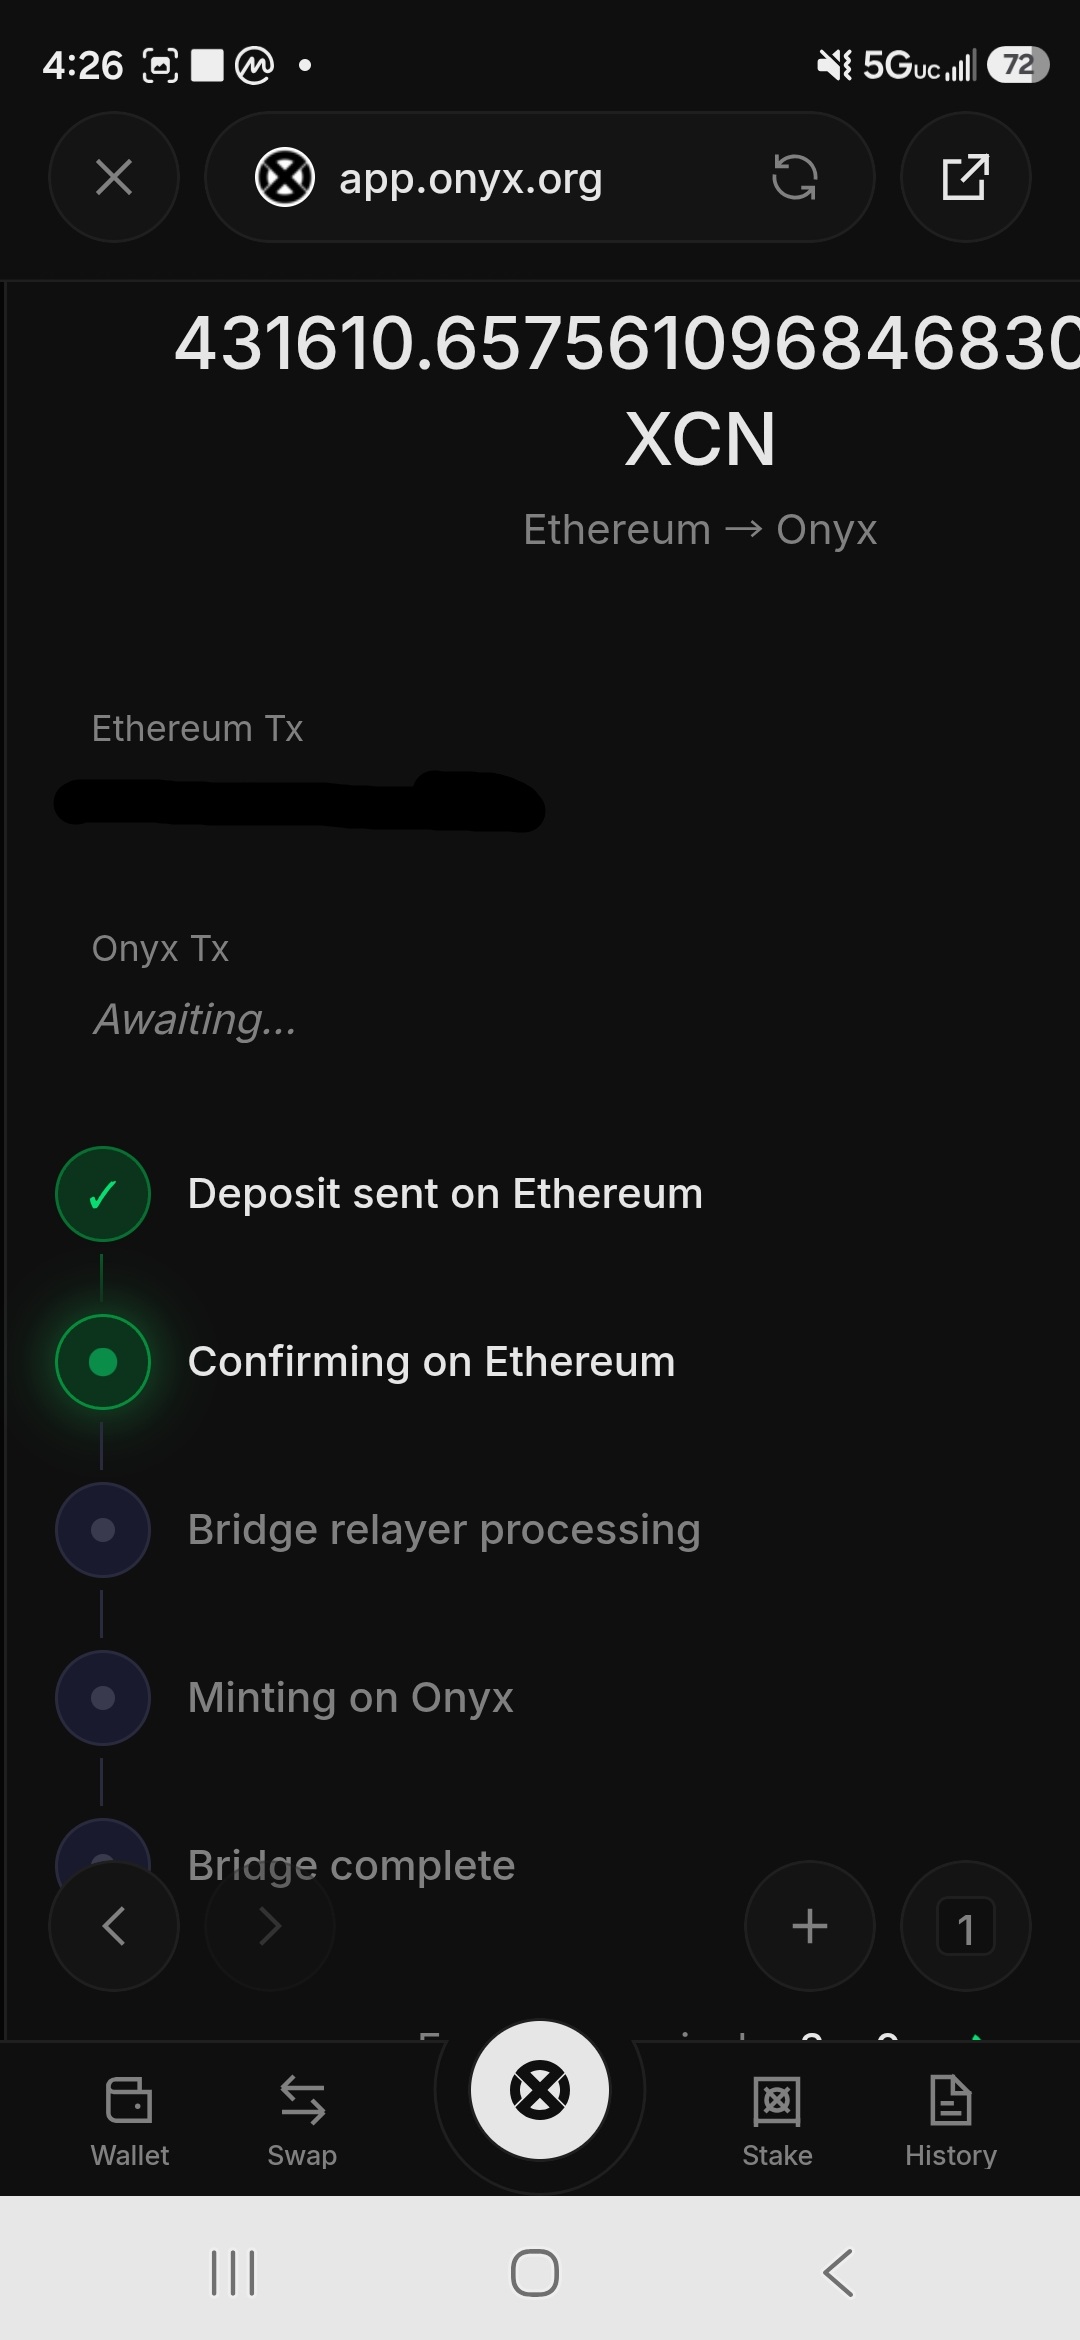
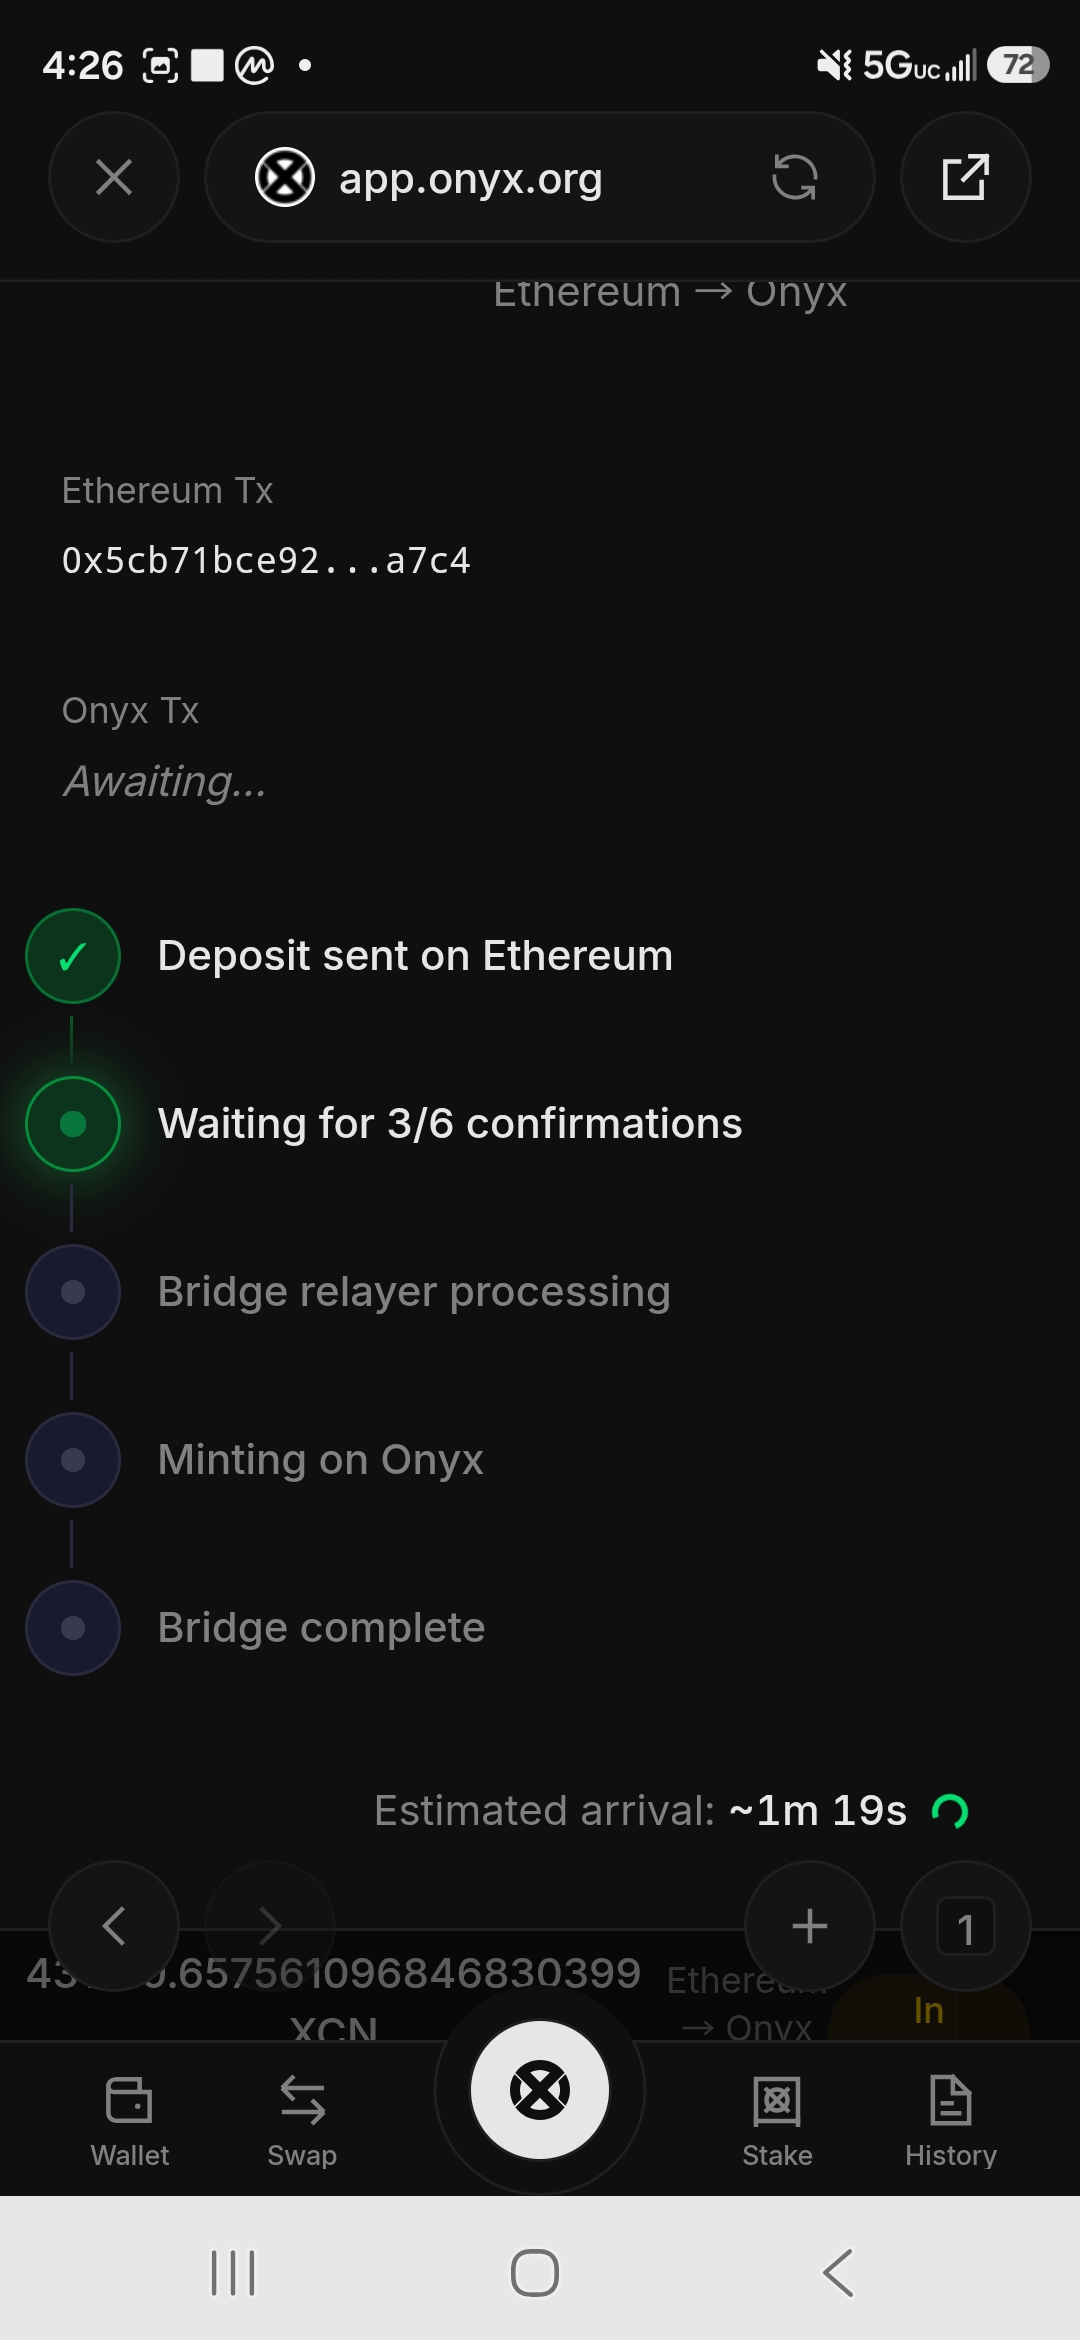
Step 8: Once Bridge complete shows all green checkmarks, your XCN is now on Onyx Layer 1.
Part 5 – Stake Your XCN on Onyx Layer 1
With XCN on Layer 1, you can now stake at 30% APR (as set by OIP-68, passed July 2026).
Step 1: In Onyx Wallet or app.onyx.org, navigate to Stake.
Step 2: You’ll see two tabs at the top – Ethereum and Onyx. Make sure you’re on the Onyx tab. You’ll see your available XCN balance on Layer 1.
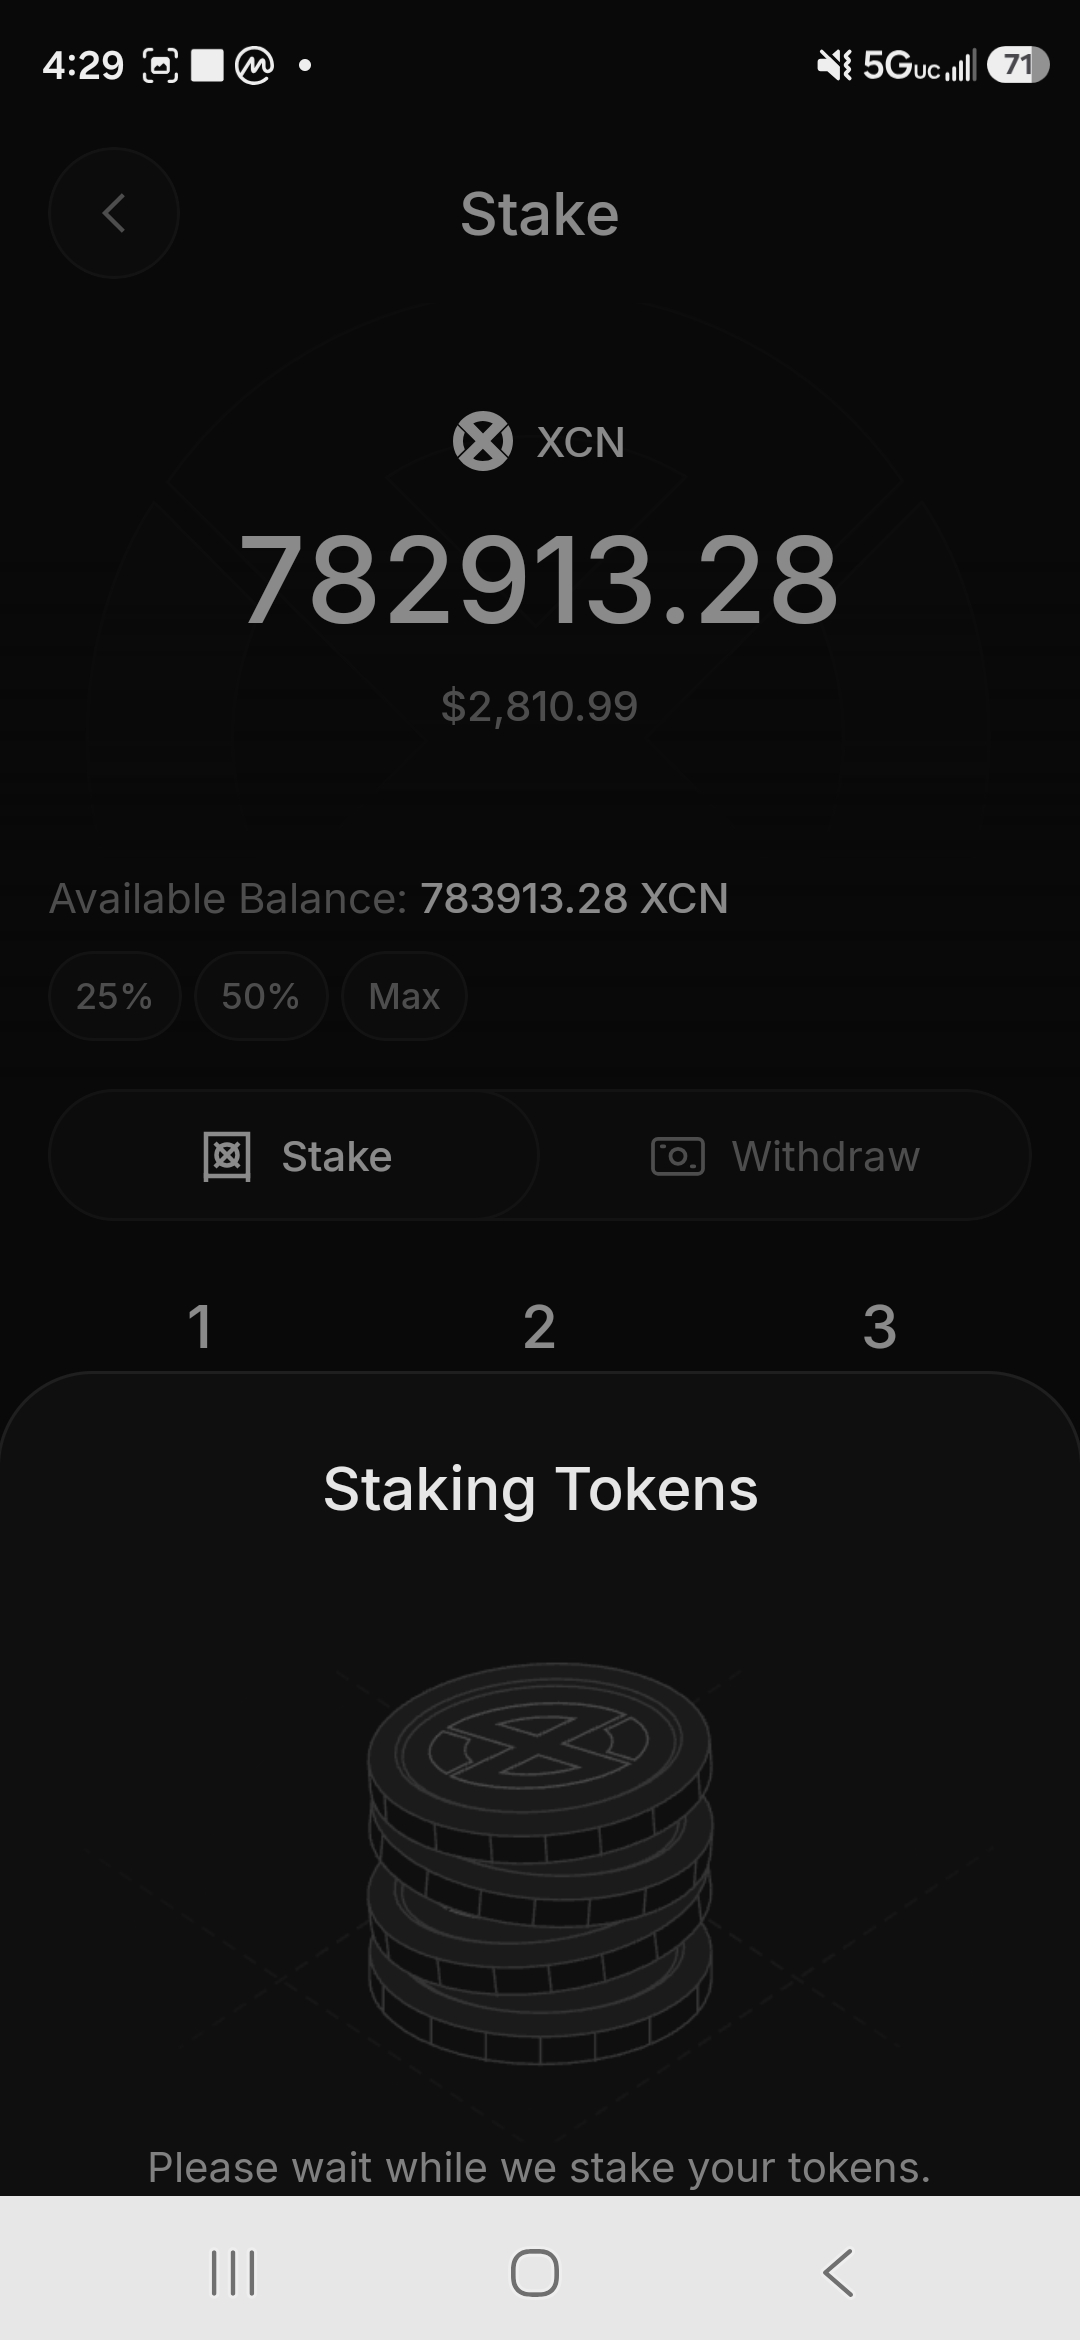
Step 3: Enter the amount you want to stake – use 25%, 50%, or Max shortcuts, or type a specific amount. You can stake in multiple batches if you prefer.
Step 4: Tap Stake. A loading animation appears with “Please wait while we stake your tokens.”
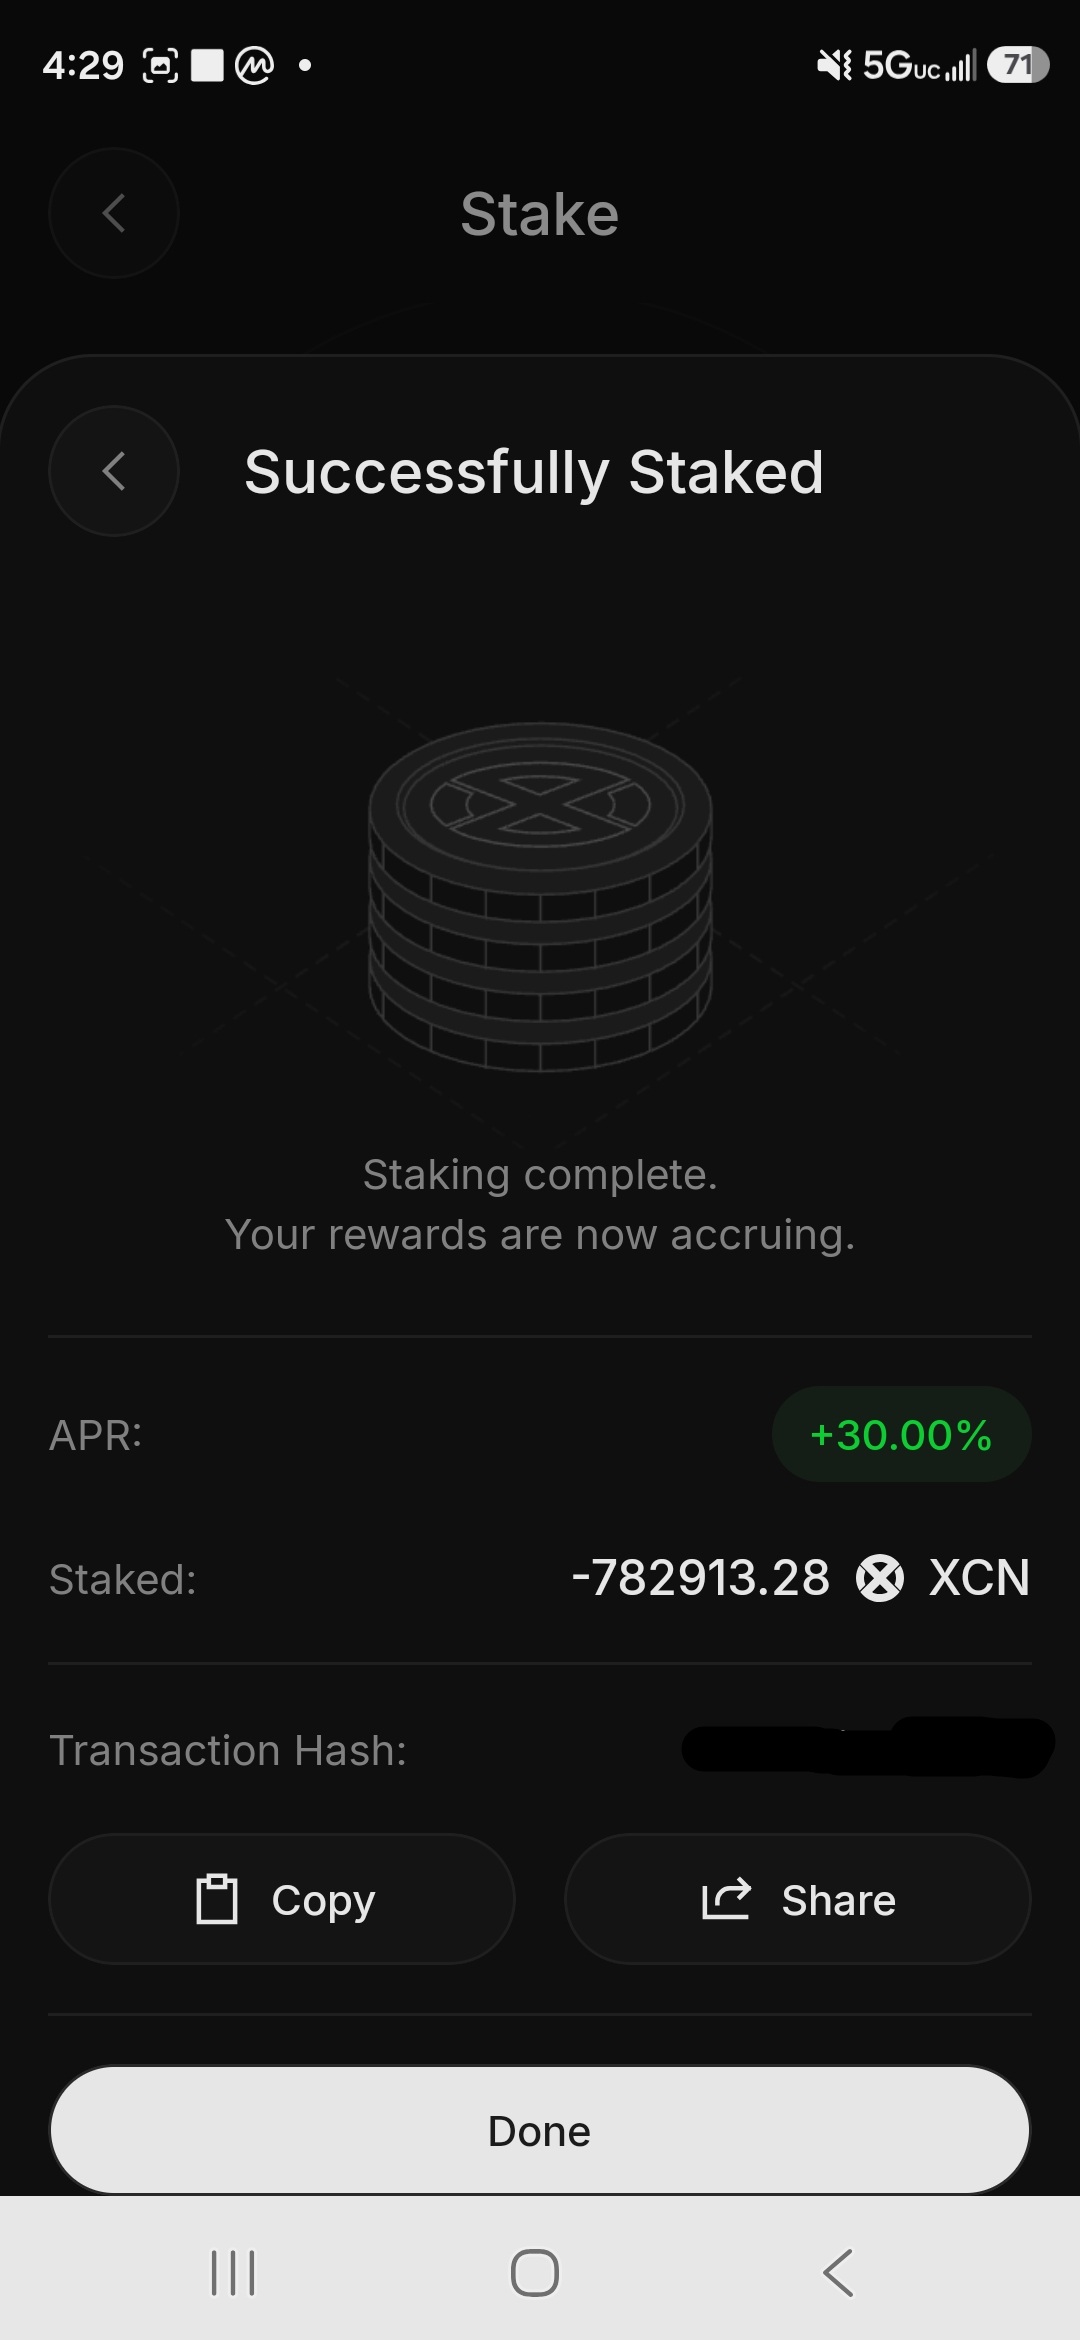
Step 5: The confirmation screen shows Successfully Staked with:
- APR: +30.00%
- Amount staked
- Transaction hash (redact this if sharing screenshots publicly)
Tap Done.
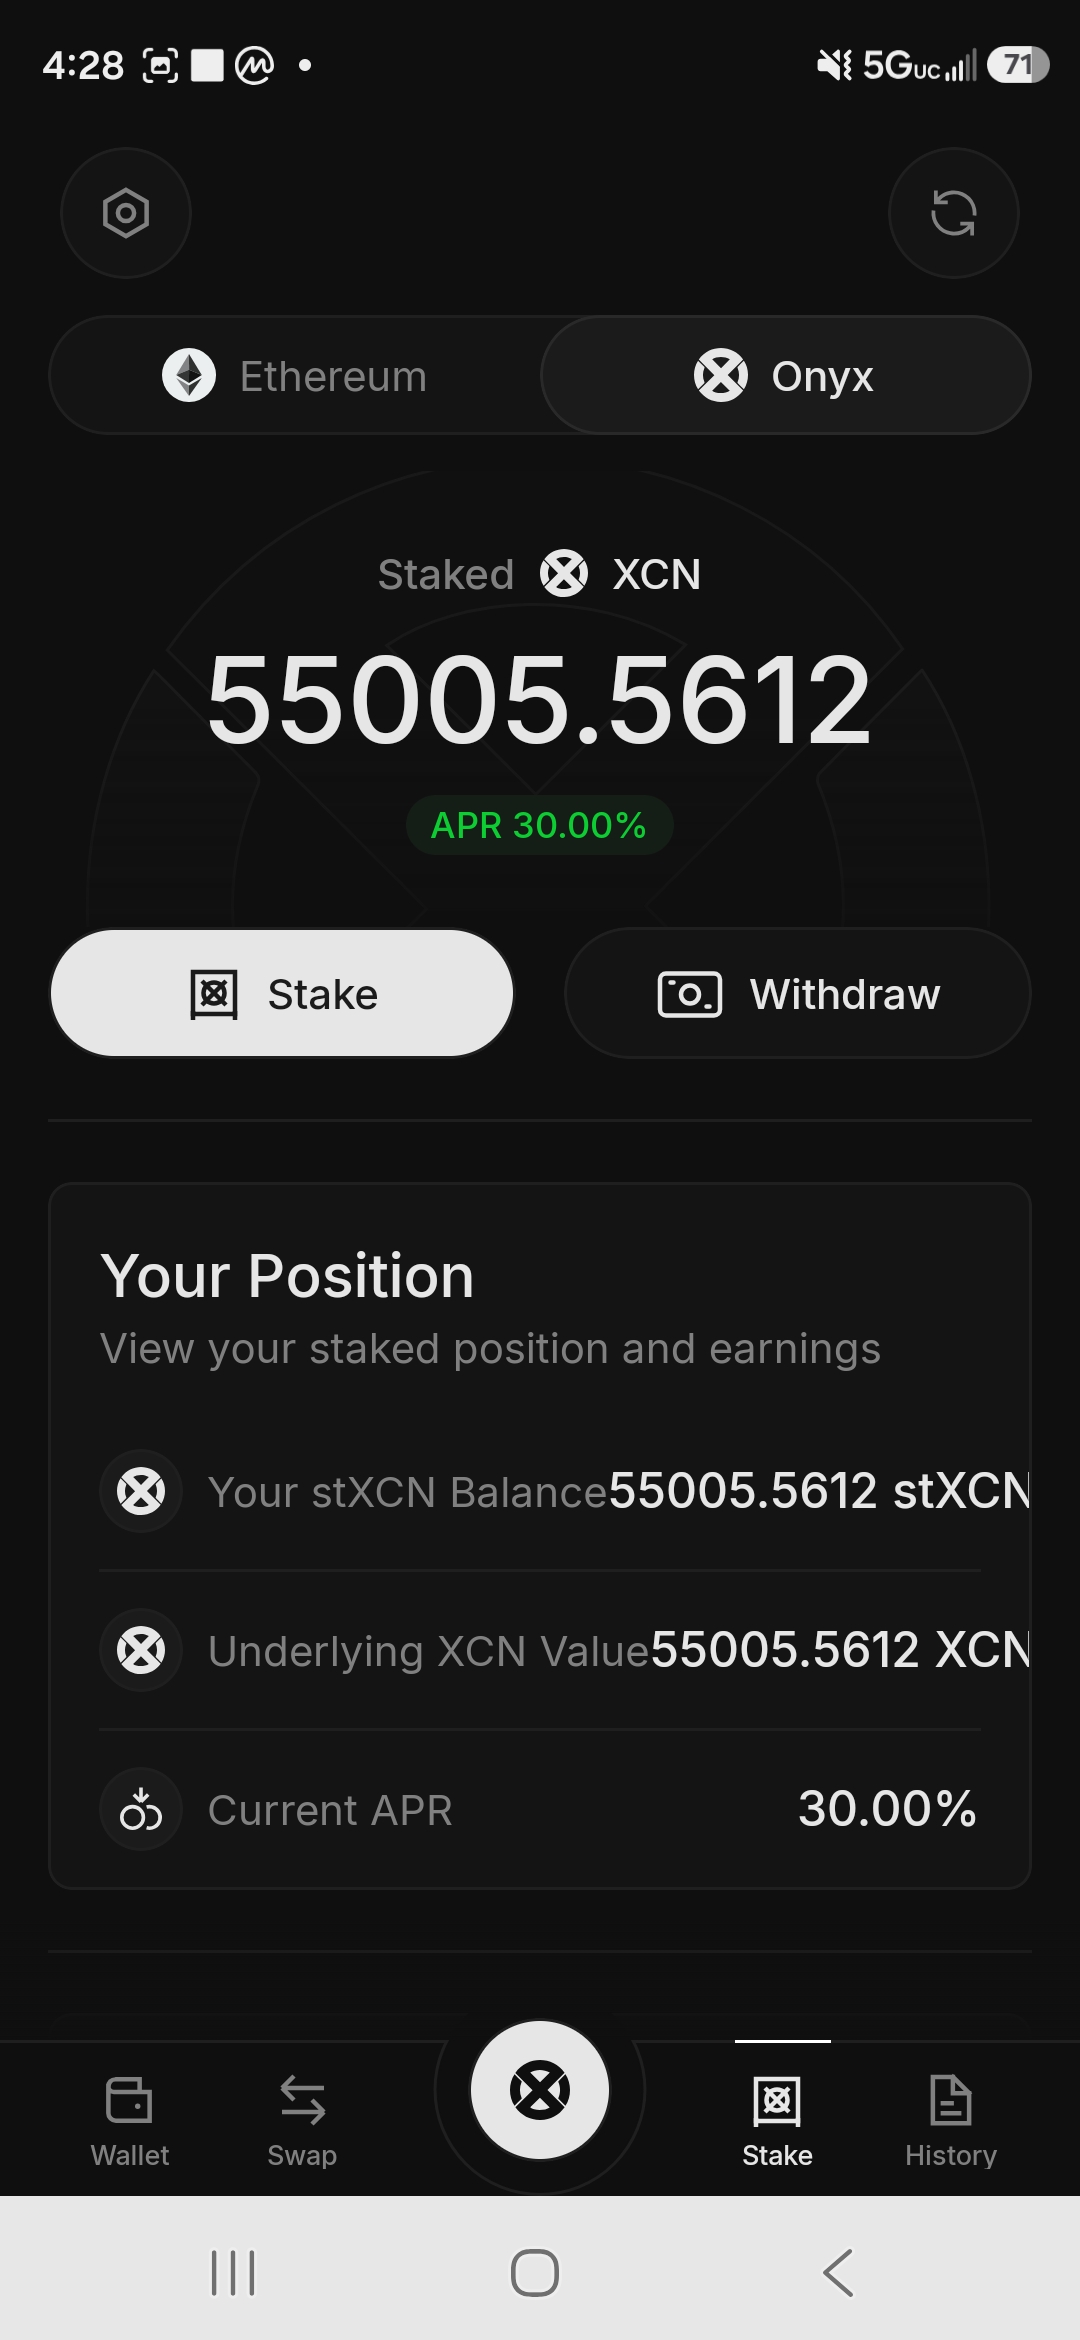
Step 6: Your Stake tab now shows your total staked XCN balance (displayed as stXCN – Staked XCN), the current 30% APR, and your position details:
- Your stXCN Balance
- Underlying XCN Value (same as stXCN at 1:1)
- Current APR: 30.00%
Your rewards are now accruing automatically.
What You Now Have
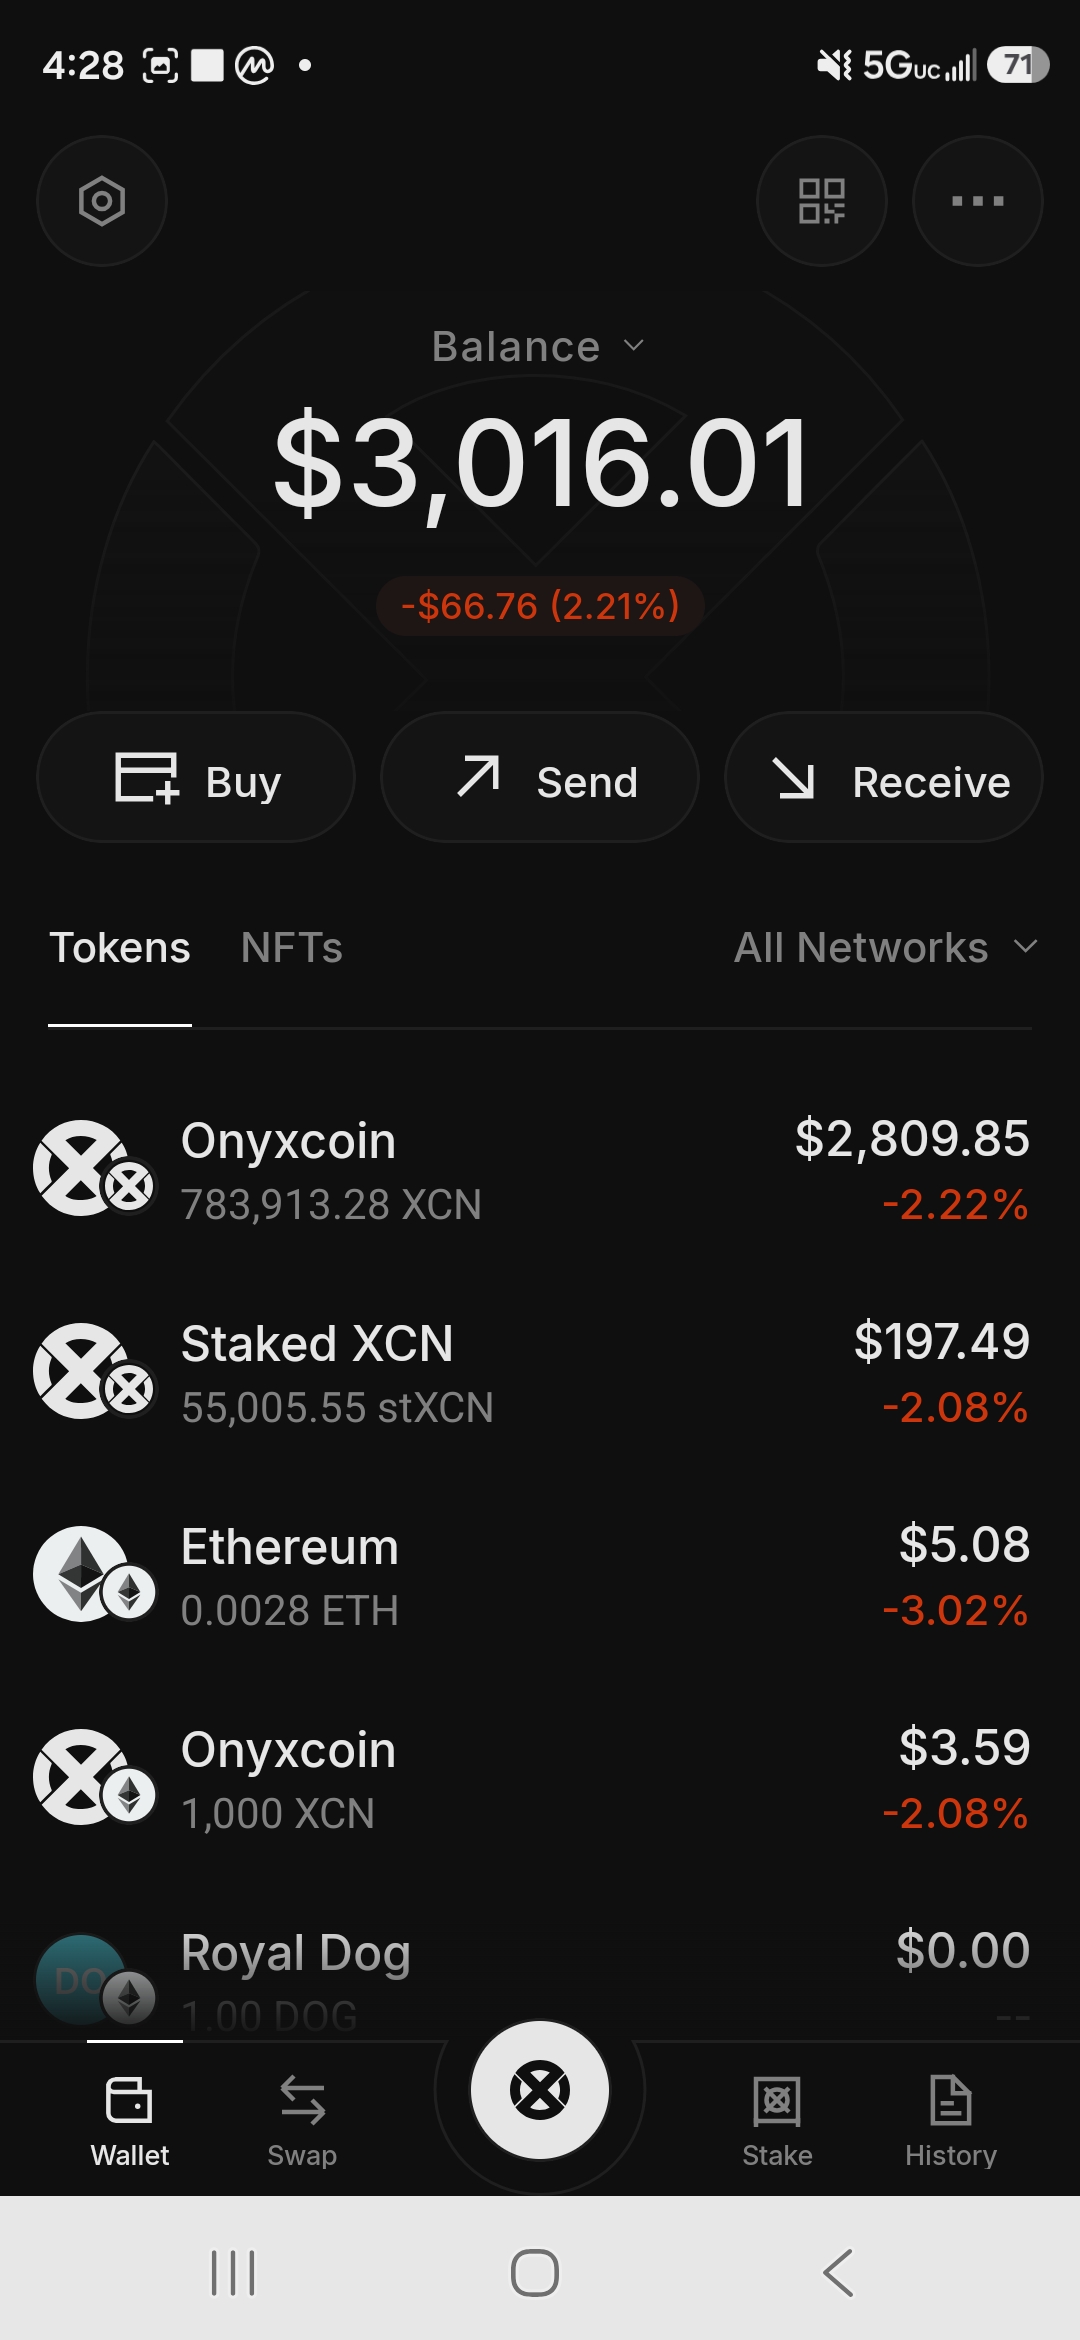
After completing all five parts, your position looks like this:
- stXCN on Onyx Layer 1 – earning 30% APR, accruing automatically
- Small XCN reserve on Ethereum – keeping your Ethereum address active for points history
- Small ETH balance – for future gas fees if needed
In your Onyx Wallet, switching to “All Networks” view shows everything in one place – your Layer 1 staked position, your Ethereum reserve, and any other tokens across networks.


Key Things to Know
The bridge is one-way by default – bridging back from Onyx to Ethereum is possible but a separate process. Don’t bridge everything if you need liquidity on Ethereum.
stXCN is liquid – unlike some staking systems, stXCN is a liquid token. You can use it in DeFi protocols on Onyx Layer 1 if you choose to, rather than just holding it for APR.
The 30% APR is set by governance – OIP-68 set this rate and it can be changed by future governance votes. It’s currently high to incentivize migration. Watch governance for any changes.
Points keep accruing – on both Ethereum and Layer 1, depending on your activity. Nobody has announced the conversion formula yet, but keeping both addresses active hedges your position.
The Layer 3 deadline is December 31, 2026 – if you have any XCN on the old Onyx Layer 3 (XCN Ledger on Arbitrum Orbit), that needs to move before the end of the year. This guide covers Ethereum to Layer 1 only – the Layer 3 migration is a separate process.
Safety Checklist
- Only use app.onyx.org – bookmark it, never click links from DMs or social media
- Only use Onyx Bridge, never Legacy Bridge for new transfers
- Download Onyx Wallet only from onyx.org
- Never share your seed phrase with anyone or any site
- The bridge confirmation will show a “deposit” function – this is correct and expected, not a red flag
This guide documents a real migration completed in July 2026. Steps and APR rates are accurate as of that date – verify current APR and bridge interface at app.onyx.org before proceeding. Not financial advice.