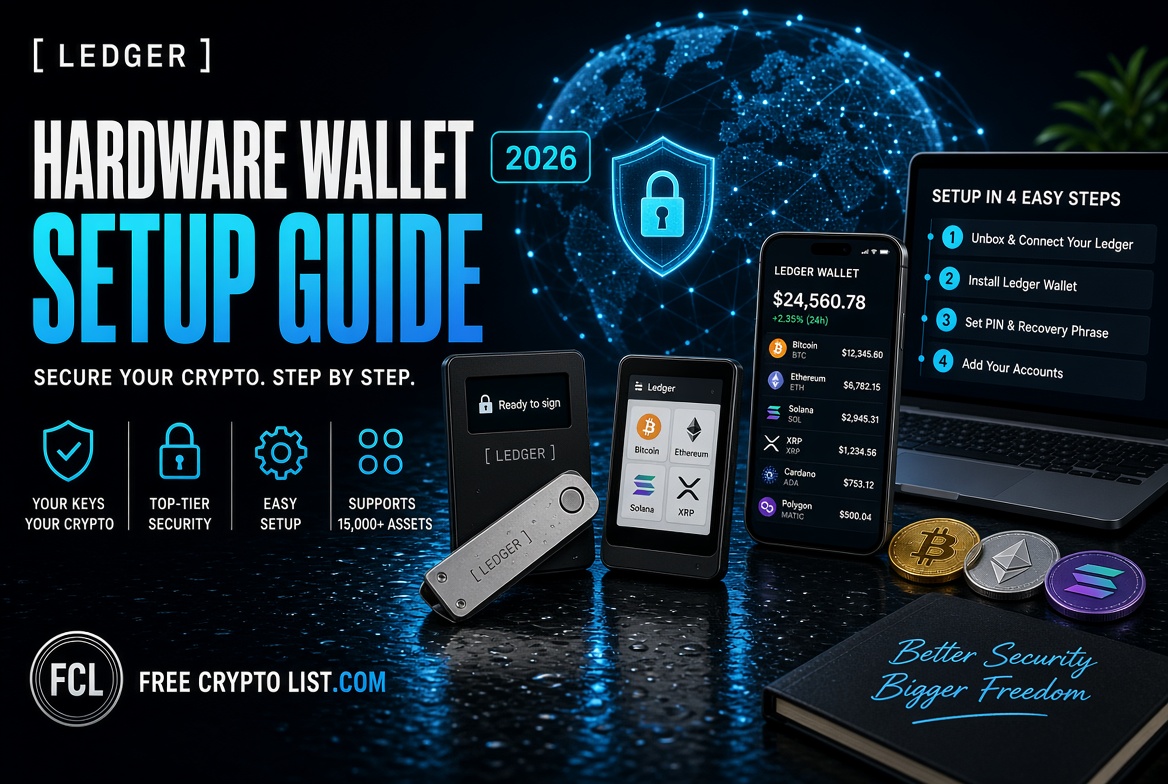
How to Set Up a Ledger Hardware Wallet in 2026 (Step-by-Step Beginner’s Guide)
Updated September 27, 2026
If you’ve been earning crypto through faucets, airdrops, surveys, or staking, at some point you’ll accumulate enough that it’s worth taking security seriously. That’s where a hardware wallet comes in – and Ledger is the most trusted name in the business, though it’s not the only option. If you want the seedless alternative, see our Tangem Wallet Review, or the fully open-source option in our Trezor Wallet Review.
This guide walks you through everything – which Ledger model to buy, how to set it up from scratch, how to transfer crypto to it, and how to use it safely for years to come. For the full picture on Ledger’s security track record and honest pros/cons before you buy, check our Ledger Wallet Review – this guide focuses purely on setup once you’ve decided.
Why Do You Need a Hardware Wallet?
Software wallets like MetaMask and Trust Wallet are great for everyday use – but they store your private keys on an internet-connected device. If your computer is compromised by malware, phishing, or hacking, a software wallet’s keys can be exposed. A Ledger hardware wallet stores your keys on a certified secure chip that never connects directly to the internet, providing bank-grade security for your crypto holdings.
Ledger is the global market leader, securing an estimated 20% of the world’s total cryptocurrency value across retail and institutional clients. Your private keys are generated and stored inside the device’s secure chip and never leave it – not during setup, not during transactions, not ever.
The general rule is simple: if you’re holding more than a few hundred dollars worth of crypto, a hardware wallet is worth every penny.
Which Ledger Model Should You Buy?
Ledger currently offers five models, not four – the lineup expanded with the Nano Gen5 since this guide was last written:
Ledger Nano S Plus – Best for Beginners (~$59) Best for beginners and budget-conscious users. USB-C connectivity only, no Bluetooth. No battery needed – it runs off your computer’s USB power. This is the one we recommend for most people starting out with pure cold storage.
Ledger Nano X – Best for Mobile Users (~$99) Best for mobile users and active traders. Bluetooth connectivity plus a built-in battery, so you can manage your crypto from your phone. Note it uses a slightly older secure element certification (EAL5+) than the rest of the current lineup (EAL6+).
Ledger Nano Gen5 (~$179) The newest model – a redesigned Nano with an E Ink touchscreen, Bluetooth, and built-in scam-detection (“Clear Signing”) that shows you exactly what you’re approving before you confirm it on-device. A genuinely good middle ground between the Nano classics and the premium models.
Ledger Flex (~$249) Larger touchscreen with Gorilla Glass, Bluetooth, and USB-C. Good for active portfolio management.
Ledger Stax (~$399) Ledger’s premium model with a curved E Ink touchscreen and wireless charging. Best for advanced users who want the flagship experience. Overkill for most beginners.
Our recommendation: Start with the Nano S Plus if you just want secure cold storage, or the Nano Gen5 if you want a touchscreen (worth having – it lets you actually read what you’re signing rather than trusting a 2-button confirmation) without paying flagship prices.
Before You Buy – One Critical Rule
Only buy your Ledger from the official Ledger website or authorized retailers. Try to avoid second-hand devices, as they can come with unnecessary risks.
A pre-owned or third-party Ledger could have been tampered with to steal your funds. Always buy brand new from ledger.com directly.
What’s in the Box
When your Ledger arrives, check the packaging carefully. You should find:
- The Ledger device
- A USB cable
- Recovery phrase sheets (to write down your seed words)
- A getting started card
- On Stax and Flex models: a Ledger Recovery Key is now included at no extra charge – see the section below on what this is and whether to use it instead of paper.
Check that the packaging tamper seals are fully intact. If anything looks opened or damaged, contact Ledger support immediately and do not use the device.
Step-by-Step Setup Guide
Step 1 – Download the Ledger Wallet App
Ledger’s official app for managing your device and crypto used to be called Ledger Live – it was rebranded to Ledger Wallet in mid-2026, though the core functionality is the same. Go to ledger.com/start on your computer and download Ledger Wallet for your operating system. Install it like any normal application.
Never download it from any other source – only the official Ledger website. If you see an app or a search result still calling it “Ledger Live,” it’s the same official app, just an outdated name.
Step 2 – Connect Your Device
Plug your Ledger into your computer using the included USB cable. The device will power on automatically and display the Ledger logo.
Step 3 – Initialize Your Device
On classic Nano models, use the buttons to navigate:
- Left button – go back / scroll left
- Right button – scroll right
- Both buttons together – confirm / select
On touchscreen models (Gen5, Flex, Stax), you’ll tap directly on screen instead. Select Set up as new device and confirm.
Step 4 – Set Your PIN Code
Choose a PIN code of 4-8 digits. You will enter this every time you use the device.
Choose something you’ll remember but that isn’t obvious – avoid 1234, your birthday, or any repeated digits. You’ll be asked to confirm your PIN by entering it a second time.
Step 5 – Write Down Your 24-Word Recovery Phrase
This is the most important step of the entire setup. The device will now display your 24-word recovery phrase – one word at a time.
Write down all 24 words on the recovery sheet included in the box, in the exact order shown. This recovery phrase is the only way to restore your wallet if the device is lost, stolen, or damaged.
Critical rules for your recovery phrase:
- Write it on paper only – never type it on a computer, phone, or take a photo
- Store it in a secure physical location – a fireproof safe or safety deposit box is ideal
- Make two copies and store them in two different physical locations
- Never share it with anyone – not Ledger support, not anyone online, not ever
If you have a Stax or Flex: you now have the option to back up your recovery phrase onto the included Ledger Recovery Key instead of (or in addition to) paper. It’s a small PIN-protected NFC card with its own secure element chip that stores your phrase and only communicates with your Ledger device over an authenticated connection – three wrong PIN attempts wipes it. It’s a genuinely more durable and harder-to-photograph backup than a paper sheet, though paper still works fine and costs nothing extra.
Once you’ve written all 24 words down (or backed up to a Recovery Key), the device will ask you to confirm the phrase by selecting specific words in order. Complete this verification carefully.
Step 6 – Update Firmware
After setup, Ledger Wallet will prompt you to update your device firmware if a newer version is available. Always keep your firmware up to date – updates include important security improvements.
Follow the on-screen instructions to complete the update. The device will restart automatically.
Step 7 – Install Coin Apps
Ledger works by installing small apps for each cryptocurrency you want to manage, supporting over 15,000 coins and tokens in total. In Ledger Wallet:
- Go to My Ledger in the left sidebar
- Connect and unlock your device
- Find the coin you want (Bitcoin, Ethereum, Solana, etc.)
- Click Install next to each coin app
Each app takes just a few seconds to install. Both the Nano S Plus and Nano X support up to 100 installed apps at once – removing an app never affects your holdings, since your crypto lives on the blockchain, not on the device.
Step 8 – Add Your Accounts
Once coin apps are installed:
- Go to Accounts in Ledger Wallet
- Click Add account
- Select your coin and follow the prompts
- Your wallet address for that coin will appear
You can now receive crypto by sharing this address – just like any other wallet.
How to Transfer Crypto to Your Ledger
Now that your Ledger is set up, move your crypto from your exchange or software wallet to your Ledger for safe storage.
In Ledger Wallet:
- Go to Accounts and select the coin
- Click Receive
- Verify the receiving address on your Ledger device screen – make sure it matches what’s shown in the app
- Copy the address and use it as the destination when withdrawing from your exchange
Always send a small test transaction first. Send a tiny amount, confirm it arrives, then send the rest. This protects you from losing funds due to a copy-paste error. For more on moving funds around safely once you’re set up, see our how to cash out crypto guide.
How to Connect Ledger to MetaMask
One of the most useful things about a Ledger is that you can connect it to MetaMask for DeFi and airdrop participation – keeping your keys secure on the hardware device while still interacting with Web3 apps.
- Open MetaMask in your browser
- Click your account icon → Connect Hardware Wallet
- Select Ledger and click Continue
- Connect and unlock your Ledger device
- Select the accounts you want to use in MetaMask
Once connected, all transactions initiated in MetaMask will require physical confirmation on your Ledger device – adding a powerful layer of security to every on-chain action. This matters even more given how wallet-draining approval scams work – always read what you’re actually confirming on the device screen, not just clicking through.
Daily Use Tips
- Always verify addresses on the device. Malware can swap addresses on your computer screen – the device screen is always trustworthy.
- Disconnect after use. Unplug your Ledger when you’re not actively using it.
- Keep your recovery phrase separate from your device. Never store them together – if someone finds both, they have everything they need to steal your crypto.
- Update firmware regularly. Check for updates in Ledger Wallet every few months.
- Never enter your recovery phrase on any website or app. Ledger will never ask you to enter your recovery phrase anywhere online. Any site or email asking for it is a scam – this is especially worth repeating since a real 2020 Ledger customer database breach led to years of phishing emails using leaked contact info. See our how to stay safe in crypto guide for the fuller picture on phishing and approval scams.
What If I Lose My Ledger?
Don’t panic – your crypto is not stored on the device itself. It’s on the blockchain. Your 24-word recovery phrase (or your Recovery Key backup, if you set one up) is what matters.
If your device is lost, stolen, or damaged:
- Buy a new Ledger
- During setup, select Restore from recovery phrase instead of setting up a new device
- Enter your 24 words in the correct order (or restore via your Recovery Key over NFC)
- All your accounts and balances will be fully restored
This is why protecting that recovery phrase is so critical – it is your crypto. The physical device is just a tool to access it.
Conclusion
Setting up a Ledger hardware wallet takes about 20-30 minutes and is one of the best investments you can make in your crypto security. Once it’s done, you can hold your crypto with confidence knowing your private keys are completely offline and protected from hackers, malware, and phishing attacks.
Start with the Ledger Nano S Plus or Nano Gen5, follow the setup steps carefully, write your recovery phrase down (on paper or a Recovery Key) and store it safely, and you’re set for years of secure crypto storage.
Ready to put it to use? Check out our guides on the best crypto wallets, how to stake crypto, and the best crypto airdrops to make the most of your secure setup. For the honest rundown on Ledger’s security history before you buy, our full Ledger Wallet Review covers it in detail, alongside how it compares to Tangem and Trezor.
The Nano S Plus (~$59) is the simplest and cheapest option for pure cold storage. If you want a touchscreen so you can actually read what you’re signing, the Nano Gen5 (~$179) is a strong middle-ground pick without paying flagship prices.
No. Ledger rebranded its app from Ledger Live to Ledger Wallet in mid-2026. It’s the same official app with the same core functionality, just a new name – download it from ledger.com/start.
Your crypto is stored on the blockchain, not the device itself, so losing the device doesn’t mean losing your funds. Buy a new Ledger, select “Restore from recovery phrase” during setup, and enter your 24-word phrase (or restore via a Recovery Key backup) to fully recover your accounts.
Not just from having the device – it’s PIN-protected, and three wrong PIN attempts wipes it. The real risk is if someone has both your device and your recovery phrase together, which is why they should always be stored separately.
Ledger Wallet supports over 15,000 coins and tokens as of 2026, including Bitcoin, Ethereum, and the vast majority of ERC-20 and other major-chain tokens.
It’s a PIN-protected physical NFC backup card with its own secure element chip, included free with Stax and Flex devices. It stores your recovery phrase as an alternative to writing it on paper, and only communicates with your Ledger device over an authenticated connection.
Back to How-To Guides
📬 Want to be notified when new airdrops go live? Join our free Airdrop Alerts list – no spam, unsubscribe anytime.
Set Up a Wallet · Buy First Crypto · Receive Crypto · Stake Crypto · Choose a Validator · Ledger Setup · Bridge Crypto · Gas Fees · Stay Safe · Scam Warning · Evaluate Projects · Track Portfolio · Crypto Taxes